Pellets Have Cracks on Surface: Causes and Fixes
News 2026-10-15
When pellets have cracks on the surface, the first step is to identify when the cracks appear. Pellets that crack immediately after leaving the die may have a different problem from pellets that develop cracks during cooling, screening, conveying, or storage.
For biomass pellet producers, surface cracks can indicate inconsistent raw material preparation, unsuitable pelletizing conditions, inadequate binding, or stress during cooling and handling. However, cracks alone do not identify a single root cause. Adjusting moisture or replacing the die without checking the production process can waste time and increase operating costs.
This guide explains how to identify common crack patterns, determine where the problem begins, and troubleshoot the causes in a practical order.
What Do Surface Cracks on Biomass Pellets Look Like?
Before changing machine settings, examine the pellets and record their condition at different production stages. The location, direction, and timing of the cracks can help narrow down the possible causes.
1. Fine Cracks Along the Pellet Surface
Fine lines or shallow cracks may appear along the pellet body. If they are already visible immediately after extrusion, investigate raw material consistency, moisture distribution, particle size, and the conditions inside the die.
Do not assume that all longitudinal cracks indicate excessive moisture. Similar appearances can result from different combinations of feedstock and operating conditions.
2. Cracks That Appear After Cooling
Pellets may look acceptable at the die outlet but develop cracks during or after cooling. This pattern makes the cooling stage an important inspection point.
Check whether cracks are already visible at the cooler inlet, appear at the cooler discharge, or develop only after screening and conveying. Also review cooling airflow, pellet temperature, moisture changes, and mechanical handling.
3. Cracks Accompanied by Rough Surfaces or Excessive Fines
If surface cracks occur together with rough pellet surfaces, weak structure, or excessive fines, the problem may extend beyond the outer appearance.
Investigate whether the material is bonding consistently during pelletizing. Raw material moisture, particle size distribution, die compression characteristics, die and roller condition, and feed rate may all need to be reviewed.
For a separate diagnosis of weak pellets that break apart during handling, see our guide to pellets coming out crumbly.
4. Cracks That Develop During Storage
If pellets leave the production line in acceptable condition but develop cracks or deteriorate during storage, inspect moisture exposure, temperature changes, storage conditions, and the handling process.
Check the pellets at the cooler discharge and compare them with samples collected after storage. This helps distinguish a problem that began during pelletizing from one that developed later.
Why Do Pellets Have Cracks on the Surface?
Surface cracks can have several causes. The following factors should be treated as diagnostic possibilities rather than automatic explanations.
1. Raw Material Moisture Is Not Suitable for the Feedstock
Moisture affects material flow, friction, heat generation, and the binding of biomass particles during pelletizing.
If the material is too wet for the current process, the pelletizing conditions may become unstable and the pellets may not develop the required structure. If it is too dry, bonding may also be inadequate, depending on the feedstock and operating conditions.
The correct moisture target depends on the raw material, particle size, machine configuration, die specification, and production process. A single moisture range should not be applied to every type of biomass.
How to check:
- Measure the moisture content of the material entering the pellet mill.
- Take representative samples rather than relying on a single measurement.
- Check whether moisture varies between batches or across different parts of the feedstock.
- Compare the readings with the operating range established for the actual raw material and equipment.
How to correct it:
If moisture is outside the verified operating range, adjust drying or moisture conditioning gradually. Mix the material thoroughly after adding water, where applicable, and recheck moisture before increasing production.
Avoid making large adjustments based only on the appearance of the finished pellets.
2. Raw Material Particle Size Is Inconsistent
Particle size affects how biomass moves through the die and how the particles compact together.
Oversized particles may create weak areas in the pellet structure, while an inconsistent particle size distribution can lead to uneven feeding and compaction. The effect depends on the feedstock, fiber characteristics, die design, and machine configuration.
How to check:
- Inspect the material leaving the hammer mill or other size-reduction equipment.
- Check the screen condition and look for damaged or unsuitable screens.
- Take samples from different points in the feedstock stream.
- Review whether the raw material or grinding settings changed when the cracks first appeared.
How to correct it:
Restore a consistent particle size distribution that is suitable for the selected die and pellet diameter. Do not assume that grinding the material as finely as possible will automatically improve pellet quality; excessive fines can also change feeding, friction, and compaction behavior.
For related guidance, see the step-by-step biomass pellet production process.
3. Die Compression Characteristics Do Not Match the Raw Material
The die affects how much the material is compressed and how long it remains under compression. Its compression ratio, hole geometry, and condition must be compatible with the feedstock and the intended pellet specifications.
A die that is unsuitable for the material may produce pellets with insufficient bonding or unstable extrusion. However, surface cracks do not prove that the compression ratio is wrong.
How to check:
- Confirm the die specifications and the raw material currently being processed.
- Review whether the feedstock has changed since the die was selected.
- Inspect die holes for wear, blockage, or uneven condition.
- Compare output, motor load, pellet appearance, and fines with the plant’s normal operating records.
How to correct it:
Confirm the appropriate die specification with the equipment or die supplier and, where necessary, conduct a controlled pelletizing test.
Do not increase the compression ratio automatically. Excessive compression for a particular material can increase resistance, heat generation, wear, or blockage risk.
For more detail, see pellet mill die compression ratio selection.
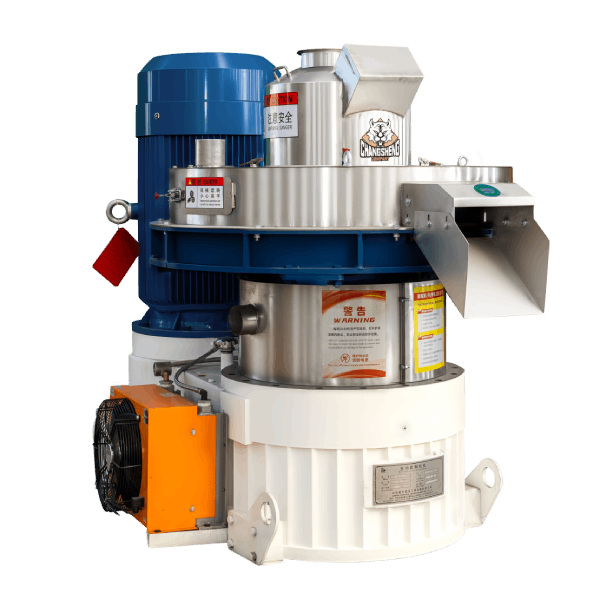
4. Die or Roller Condition Has Changed
A die or roller that is worn, damaged, blocked, or operating outside its intended adjustment can affect material feeding and compression.
If the pellets were previously acceptable but suddenly develop surface cracks under apparently unchanged conditions, inspect the equipment before changing multiple process settings.
How to check:
- Review whether production output or motor load has changed.
- Inspect the die holes for wear, deposits, and blockage.
- Check the roller surfaces and adjustment according to the machine manufacturer’s procedure.
- Review maintenance records and recent die or roller changes.
How to correct it:
Clean, adjust, repair, or replace components only when inspection identifies a relevant problem. Follow the manufacturer’s maintenance and safety procedures, and isolate the machine from its energy sources before opening the die chamber or inspecting moving components.
Replacing a die without confirming the cause may not resolve cracks originating in raw material preparation, cooling, or conveying.
5. Pelletizing Conditions Are Unstable
Even when the raw material and die are suitable, inconsistent operating conditions can affect pellet formation.
Possible factors include fluctuating feed rate, uneven material distribution, changes in die temperature, and differences between startup and steady-state operation.
How to check:
- Record when the cracks first appear: startup, normal production, or after a material change.
- Compare feed rate, motor load, and die temperature with the plant’s normal operating records.
- Check whether material is being supplied consistently.
- Review recent changes to machine settings, raw materials, or operating procedures.
How to correct it:
Stabilize material feeding and return the machine to its verified operating procedure. Make one controlled adjustment at a time and compare the resulting pellets with the previous samples.
Do not increase temperature, pressure, or feed rate without confirming that the proposed change is appropriate for the machine and feedstock.
6. Cooling or Downstream Handling Creates Additional Stress
Pellets continue to change as they cool and stabilize after leaving the die. Poorly matched cooling conditions, moisture changes, or excessive mechanical impact can cause cracks or reveal weaknesses that were not obvious at the die outlet.
Conveying and screening may also generate fines or damage pellets that initially appeared acceptable.
How to check:
Collect samples at several points:
- Immediately after the pellet mill.
- At the cooler inlet.
- At the cooler discharge.
- After screening or conveying.
- After a defined storage period, if storage deterioration is suspected.
Compare the crack pattern, pellet strength, temperature, moisture, and fines content at each point.
How to correct it:
Review cooler settings against the equipment specification, pellet diameter, throughput, and ambient conditions. Check transfer points for unnecessary drops, excessive impact, and abrasion.
If the pellets only deteriorate after cooling, do not immediately change the die compression ratio. First determine whether the problem begins in the cooling, screening, conveying, or storage stage.
For this specific problem, see pellets breaking apart after cooling.
How to Troubleshoot Surface Cracks Step by Step
A consistent inspection sequence helps avoid unnecessary adjustments and makes the results easier to compare.
Step 1: Collect Representative Pellet Samples
Collect samples from the die outlet and the later stages of production. Label each sample with its collection point, time, raw material batch, and operating condition.
Photograph the cracks under consistent lighting. Record whether the cracks are longitudinal, circumferential, shallow, or associated with rough surfaces and broken pellets.
Step 2: Identify Where the Cracks First Appear
Compare the samples in production order.
If cracks are present at the die outlet, focus first on raw material preparation, moisture, die characteristics, and pelletizing conditions.
If the pellets appear intact at the die outlet but crack later, investigate cooling, screening, conveying, and storage before changing the pellet mill settings.
Step 3: Measure Moisture and Check Particle Size
Measure raw material moisture at the feed point and verify that particle size is consistent with the process requirements.
Where useful, measure finished pellet moisture as well. Use an appropriate, calibrated measurement method and compare results with the operating targets established for the material and intended market.
Step 4: Inspect the Die and Rollers
Check die condition, hole blockage, wear, and roller adjustment using the manufacturer’s procedure.
If the equipment condition has changed, correct the identified issue before making unrelated process adjustments.
Step 5: Review Operating Records
Compare the current run with a previous run that produced acceptable pellets, if records are available.
Look for changes in raw material, moisture, feed rate, die temperature, motor load, equipment condition, cooling settings, or handling.
A change that coincides with the onset of cracking can help narrow the investigation, but it should still be verified rather than treated as proof.
Step 6: Make One Controlled Adjustment at a Time
Choose an adjustment that corresponds to the evidence collected. Keep other conditions as stable as practical, then collect new samples and compare the results.
Changing several variables simultaneously makes it difficult to determine which adjustment helped or made the problem worse.
Step 7: Verify the Result
Check whether the cracks have decreased and whether pellet strength, fines, output, and operating stability remain acceptable.
A smoother surface alone does not establish that pellet quality has improved. Where required, use appropriate durability, moisture, and fines tests to verify the result against the product specification.
How to Prevent Surface Cracks in Biomass Pellets
Preventive measures should focus on consistency and early detection rather than relying on one universal machine setting.
- Control incoming material: Monitor moisture, particle size, and variation between batches.
- Maintain consistent feeding: Avoid unnecessary fluctuations in material supply.
- Use a suitable die: Match die specifications to the feedstock and target pellet characteristics.
- Maintain the pellet mill: Inspect die holes, rollers, and related components according to the maintenance schedule.
- Monitor cooling: Confirm that cooling conditions suit the pellet size, production rate, and ambient environment.
- Reduce handling damage: Review screening, conveyor transfers, and loading points for excessive impact or abrasion.
- Keep production records: Record operating conditions alongside pellet samples so that changes can be traced.
- Verify finished quality: Use appropriate tests rather than relying solely on visual appearance.
For a broader assessment of finished pellets, see how to test wood pellet quality.
When Should You Review the Pellet Production Line?
If surface cracks persist after basic checks, or if the problem appears across multiple production stages, review the complete production process rather than focusing only on the pellet mill.
A useful assessment should include the raw material preparation system, moisture control, grinding and feeding equipment, die and roller condition, cooling system, screening, conveying, and storage.
For plant operators and project engineers, the objective is to identify the stage where the defect begins and verify the corrective action with measurable results. This approach is more reliable than replacing components or changing settings without a confirmed diagnosis.
Shandong Changsheng Machinery Co., Ltd. supplies biomass pellet machinery and production-line equipment. When evaluating a production-line configuration, raw material characteristics, target output, pellet specifications, and downstream equipment should be considered together.
Frequently Asked Questions
Why do pellets have cracks on the surface?
Surface cracks can be associated with unsuitable raw material moisture, inconsistent particle size, inadequate bonding during pelletizing, die or roller problems, or stress during cooling and handling. The first step is to determine when the cracks appear and then verify the likely cause.
Do surface cracks always mean the raw material is too dry?
No. Both excessive and insufficient moisture can affect pellet formation, but the result depends on the raw material and process. Check moisture measurements and other operating conditions before making adjustments.
Why do pellets crack after leaving the pellet mill?
If cracks appear after the die outlet, review the cooling process, moisture changes, screening, conveying, and handling. Compare samples from different production stages to locate where the cracks begin.
Can the pellet die cause surface cracks?
Yes, an unsuitable or damaged die can contribute to poor pellet formation. However, the presence of cracks alone does not prove that the die needs replacement. Inspect its condition and verify the specification against the raw material.
How can I reduce surface cracks without replacing the die?
Start by checking moisture, particle size, feeding consistency, operating records, and cooling conditions. Correct confirmed problems first. If the cracks persist, inspect the die and rollers and consult the equipment supplier where necessary.
Are cracked pellets always unsuitable for sale?
Not necessarily. Acceptability depends on the severity of the cracks, pellet durability, fines content, intended application, and buyer specifications. Visual inspection should be combined with appropriate quality tests when product acceptance is important.
What information is useful when diagnosing cracked pellets?
Useful information includes photographs of the cracks, the stage at which they first appear, raw material type, moisture measurements, particle size, die specifications, operating records, and samples or test results from before and after cooling. This information helps narrow down possible causes without assuming a diagnosis from appearance alone.
Conclusion
When pellets have cracks on the surface, do not assume that one moisture adjustment or a new die will solve the problem. Identify where the cracks first appear, examine the raw material and pelletizing conditions, inspect the equipment, and compare samples from each production stage.
A step-by-step investigation helps identify the actual cause, avoid unnecessary equipment changes, and improve the consistency of biomass pellet production.