Pellet Mill Not Feeding: How to Diagnose and Fix Feed Problems Step by Step
News 2026-10-10
A pellet mill not feeding is almost never a single fault. It is a symptom that can come from the feedstock, the feeder, the die chamber, the drive system, or the operating procedure. In most cases, the mill is capable of running; what fails is the stable flow of material from the storage bin to the die chamber.
The practical question for an operator or maintenance engineer is not which part is broken. The real question is where in the feed chain the flow stops, and what condition changed before the problem appeared. This guide answers that question in order.
This page is written for plant operators, maintenance engineers, and procurement managers who need to diagnose a feeding problem without replacing the whole machine. It covers the feed chain, the most common causes, a step-by-step diagnosis, the difference between flat die and ring die feeding behavior, the difference between feed pellet and biomass pellet feeding behavior, cold climate and humid climate effects, and the operating and design changes that prevent the problem from returning. For the general machine concept, see the pellet mill page on this site. For ring die machine details, see the ring die pellet machine page on this site.
What “Not Feeding” Actually Means
“Not feeding” is used to describe several different symptoms. They should be separated before diagnosis begins.
No material enters the die chamber. The feeder runs but material does not move forward.
Material enters the feeder but bridges in the hopper. A stable arch forms above the screw or the chute.
Material enters the die chamber but rollers do not pick it up. The die runs but output is very low.
Material enters the die chamber but the motor overloads. The mill feeds for a short time, then trips.
Material feeds for a short period, then stops. Output fluctuates between normal and zero.
Each symptom points to a different part of the feed chain, and each has a different solution. Treating them as one problem leads to unnecessary part replacement.
The Feed Chain: Where Flow Can Stop
Material moves through several stages before it reaches the die. Each stage can stop the flow.
Storage and receiving hopper.
Feeder inlet and hopper transition.
Feeder screw or belt.
Feeder discharge into the die chamber.
Die chamber and roller pick-up zone.
Die holes and compression zone.
Flow can stop at any of these stages. The diagnosis should follow the material path in order, from storage to die.
Flat Die vs Ring Die Feeding Behavior
The feeding behavior differs between flat die and ring die machines, and so do the feeding problems.
A flat die machine uses a flat plate die. The feeder usually discharges onto the top of the die, and material is spread across the die by gravity and roller rotation. Flat die machines are more sensitive to feeder discharge height and to the distribution of material across the die. Bridging in the feeder is a common problem, and uneven distribution causes uneven die wear.
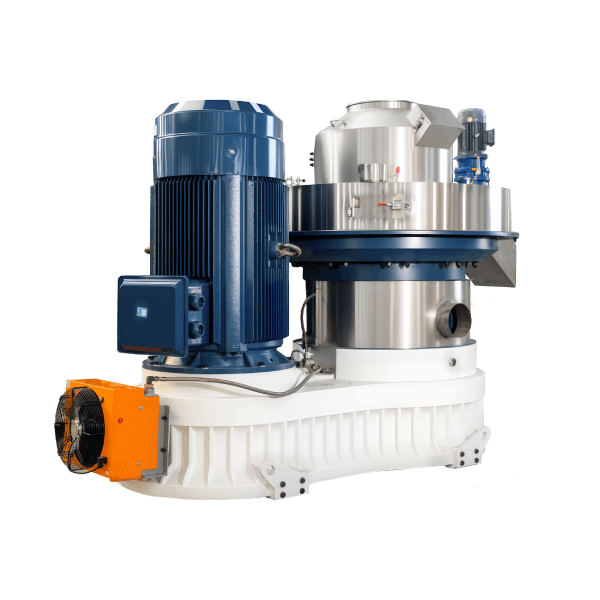
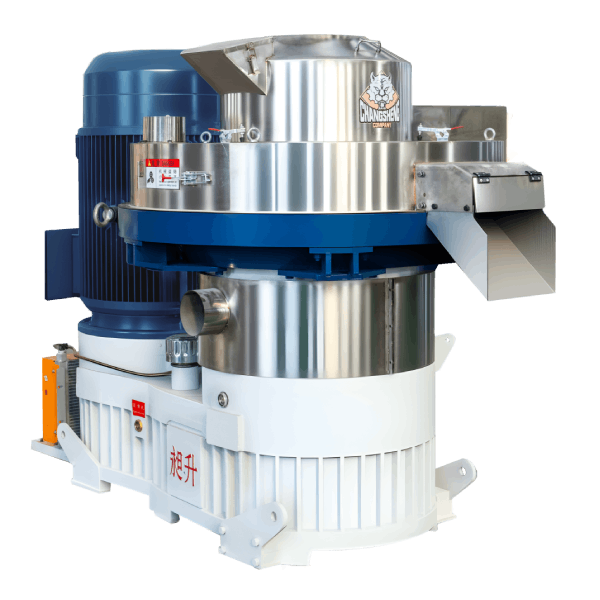
A ring die machine uses a vertical ring die. Material is fed into the center of the ring, and rollers press it outward against the die. Ring die machines are more sensitive to feeder alignment and to the angle at which material enters the die chamber. If the feeder discharges off-center, one side of the die receives more material than the other, and that side wears faster. Ring die machines also have a smaller feed window between the rollers, so the feeder must deliver material steadily and in the correct position.
In practice, a feeding problem that looks the same on the operator panel may have different causes on a flat die machine and on a ring die machine. The diagnosis should start by confirming which machine type is in use, and by checking the feeder position relative to the die.
Feed Pellet vs Biomass Pellet Feeding Behavior
The feeding behavior also differs between feed pellet and biomass pellet production.
Feed pellets usually use steam conditioning. The material enters the die chamber warm and with a controlled moisture. This improves binding and reduces friction, but it also makes the material stickier. Feed pellet feeding problems are usually related to conditioner performance, moisture consistency, and feeder design for warm, sticky material.
Biomass pellets usually rely on friction heat generated in the die. The material enters the die chamber at ambient temperature. Biomass materials are often more fibrous, lower in bulk density, and more variable in moisture. Biomass pellet feeding problems are usually related to hopper bridging, feeder mismatch for fibrous material, and moisture variation.
A feeder that works well for feed pellets may not work well for biomass pellets, and vice versa. The feeder should be selected based on the actual application, not on the machine type alone.
Cold Climate and Humid Climate Feeding Problems
Climate affects feeding behavior.
In cold climate, material can freeze or become stiff, especially if it contains high moisture. Frozen lumps do not feed through the screw, and they can block the die chamber. Condensation can also form on cold metal surfaces and cause material to stick. Cold climate feeding problems are usually related to material temperature, condensation, and lump formation.
In humid climate, material can absorb moisture from the air during storage and feeding. This increases stickiness, causes bridging, and reduces friction in the die. Humid climate feeding problems are usually related to moisture regain, hopper design, and ventilation.
In both climates, the moisture check should be done at the feeder inlet, not only at storage, because material conditions can change between storage and feeding.
Common Causes of Pellet Mill Not Feeding
Moisture Too High
High moisture makes material sticky and heavy. It bridges in the hopper, sticks to the feeder screw, and blocks the die chamber. High moisture also reduces friction in the die, which lowers die temperature and weakens pellets. In severe cases, moisture causes the die holes to block, and the mill appears to stop feeding even though the feeder is running. The effect depends on feedstock type, feeder design, and die specification.
Moisture Too Low
Very dry material is light and dusty. It does not compact well in the feeder screw, and it can fluidize and leak back through the feeder. In the die chamber, low moisture reduces binding and increases fines. The mill may feed unevenly and produce weak pellets. The effect depends on feedstock type, particle size, and ambient humidity.
Particle Size Too Fine or Too Coarse
Fine material tends to bridge and to compact into lumps. Coarse material tends to separate and to feed unevenly. Both cause unstable feeding. Particle size should be consistent and within the range suitable for the die. The correct range depends on feeder design and die specification.
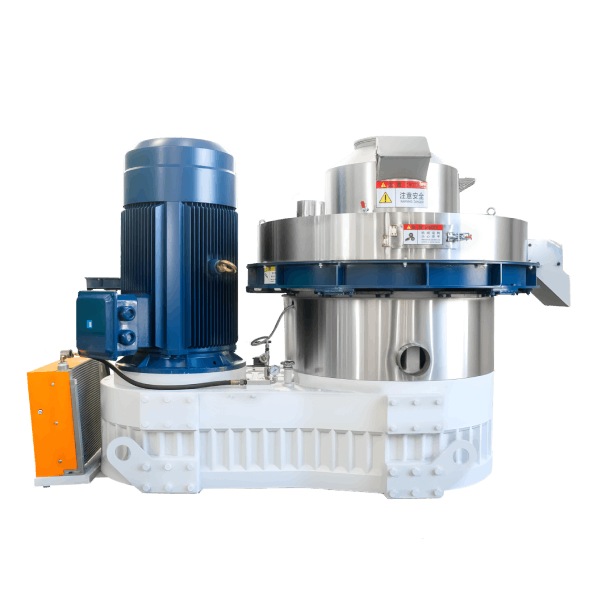
Feeder Design Not Matched to Feedstock
A feeder designed for free-flowing sawdust may not handle fibrous material, light shavings, or sticky agricultural residue. A screw feeder with the wrong pitch, diameter, or speed may not move material at the required rate. This is one of the most common causes of feeding problems in projects that changed feedstock without changing the feeder. Feeder design should be reviewed whenever the feedstock changes.
Feeder Screw Worn or Damaged
A worn screw loses conveying efficiency. Material slips back along the flights, and output drops. A damaged screw may also cause pulsating feed and motor overload.
Hopper Bridging and Rat-Holing
Bridging is a stable arch of material above the feeder inlet. Rat-holing is a narrow channel that forms above the feeder while the rest of the material stays in place. Both reduce or stop flow, even though material is present in the hopper. Low bulk density, high moisture, and fine particle size increase bridging risk.
Feeder Position and Alignment
The feeder discharge position relative to the die chamber affects feeding stability. On a ring die machine, off-center discharge causes uneven die wear and uneven roller load. On a flat die machine, incorrect discharge height causes uneven material distribution across the die. Feeder position and alignment should be checked against the supplier drawing, not adjusted by guess.
Roller Slip and Roller Clearance
If roller clearance is too large, rollers do not grip the material, and material accumulates in the die chamber without being pressed through the die. If clearance is too small, rollers and die wear faster and motor load rises. Both conditions reduce effective feeding. Roller clearance should be set according to the supplier procedure, and the exact value depends on die size, roller size, feedstock, and machine design.
Die Blockage
If die holes are blocked with hardened material, new material cannot pass through. The die chamber fills up, and the mill appears to stop feeding. Die blockage is usually caused by moisture, wrong compression ratio, or a long shutdown without cleaning. Cleaning intervals depend on feedstock, moisture, and operating hours, and should be confirmed with the supplier.
Motor Overload and Protection Trips
If the motor trips on overload, feeding stops even though the feeder and die are mechanically fine. Overload can be caused by excessive feed rate, hard material, wrong die, low voltage, or worn bearings. Motor current should be compared against the motor nameplate and against the normal operating current for the current feedstock. Normal operating current is best established by recording current during stable production, and by using that record as the reference for later comparison.
Voltage and Frequency Variation
Low voltage reduces motor torque. The feeder and main motor may run slower or stall. In projects with unstable grid power, voltage variation can appear as a feeding problem.
Wrong Operating Procedure
Feeding a cold die at full rate, starting the mill with material already in the die chamber, or running at the wrong feed rate for the current moisture all cause feeding problems. Operating procedure is often overlooked because the machine itself is fine.
The operating phase matters. During startup, the die is cold and material is not yet soft; feed rate should be low and increased gradually. During steady-state production, feed rate should be matched to moisture and particle size. During shutdown, the die should be cleaned or run out according to the supplier procedure, so that material does not harden in the die overnight.
Step-by-Step Diagnosis
The diagnosis should follow the material path in order.
Step 1: Confirm the Symptom
Record exactly what happens. Does material reach the feeder? Does it reach the die chamber? Does the motor trip? Does output fluctuate? Write down the sequence, because the sequence points to the stage.
Step 2: Check Feedstock Conditions
Check moisture at the feeder inlet, not only at storage. Check particle size distribution. Check for contamination such as metal, stones, or foreign material. If the feedstock changed recently, this is the first place to look.
Step 3: Check the Hopper and Feeder Inlet
Look for bridging and rat-holing. Tap the hopper and see whether material moves. Check the hopper transition for lumps or compacted material. Check for material sticking to the hopper wall.
Step 4: Check the Feeder
Run the feeder without the main motor and observe whether material moves at a steady rate. Check screw wear, pitch condition, and discharge opening. Check whether the screw is turning at the correct speed and direction. Check the variable frequency drive setting if the feeder is variable speed.
Step 5: Check the Die Chamber and Rollers
Stop the mill and lock out the power. Open the die chamber. Check whether material is present in the chamber and whether it is compacted. Check roller clearance against the supplier specification. Check roller condition and die hole condition. Check for blocked die holes.
Die chamber cleaning should follow the supplier procedure. The general sequence is: lock out the power, remove the die chamber cover, remove compacted material with the correct tool, clear blocked die holes with the correct punch, inspect the die and rollers, and reassemble with the correct torque. Do not use force on the die surface, do not use water or solvent unless the supplier approves it, and do not leave the die chamber open longer than necessary.
Step 6: Check the Motor and Electrical System
Check motor current at no load and at load. Compare against the motor nameplate and against the normal operating current for the current feedstock. Normal operating current should be taken from a stable production record for the same feedstock and die. Check voltage and frequency. Check overload protection settings. Check for worn bearings or unusual vibration.
Step 7: Check the Operating Procedure
Review the startup procedure, the feed rate ramp-up, and the shutdown procedure. Check whether the operator is running at the correct feed rate for the current moisture and particle size. Check whether the die is being warmed up before full rate is applied. Check whether the die is being cleaned or run out at shutdown.
Step 8: Check the Feeder Position and Alignment
Compare the feeder discharge position against the supplier drawing. On a ring die machine, confirm that material enters the center of the ring and that the feed is not biased to one side. On a flat die machine, confirm that material is distributed evenly across the die. Incorrect feeder position is a common cause of uneven feeding and uneven die wear, and it is often missed because the feeder itself is working.
Decision Guide: What to Do Next
If the feedstock is out of specification, correct moisture or particle size before adjusting the mill.
If the hopper is bridging, change hopper geometry, add a vibrator, or change the feeder inlet design.
If the feeder is worn or undersized, repair or replace the feeder, or change the feeder type for the current feedstock.
If the feeder position is wrong, adjust it according to the supplier drawing.
If roller clearance is wrong, adjust clearance according to the supplier procedure. Roller clearance adjustment should be done with the power locked out, using the correct feeler gauge or clearance tool, and following the supplier’s torque and locking procedure.
If die holes are blocked, clean the die and correct the moisture or compression ratio.
If the motor trips, check feed rate, material hardness, die condition, voltage, and overload settings before replacing the motor.
If the operating procedure is wrong, retrain operators and update the startup and shutdown procedure.
Preventive Measures
Feeding problems can be prevented with a few routine practices.
Test feedstock moisture and particle size before every production run, or at least at each feedstock change.
Match the feeder design to the actual feedstock, and review the feeder when the feedstock changes.
Check feeder position and alignment at commissioning and after any maintenance.
Keep the hopper and feeder clean and inspect for wear.
Check roller clearance and die condition at planned intervals.
Warm up the die before applying full feed rate.
Run out or clean the die at shutdown to prevent hardening overnight.
Keep a log of feedstock, moisture, feed rate, motor current, and output, so that changes are visible before they become failures.
Keep spare feeder parts and die components on site for quick replacement.
Effect on Energy Consumption and Die Life
Feeding problems usually increase energy consumption and reduce die life. When material slips or bridges, the mill runs at low output while the motor continues to draw power. When feed is uneven, part of the die works harder than the rest, which accelerates local wear and shortens die life. When material is compacted in the die chamber without being pressed through the die, the die can overheat, which further reduces die life.
For this reason, feeding problems should be corrected quickly, not only for output reasons but also for cost per ton and for die replacement frequency.
When to Call the Supplier
Contact the supplier if the die chamber is blocked with hardened material, if die holes cannot be cleared, if motor current is abnormal at no load, if the gearbox or main shaft shows unusual vibration, if the feeder cannot be matched to the feedstock even after design review, or if the feeding problem returns after corrective action. These conditions require technical support, and often require a new feeder or die configuration.
Frequently Asked Questions
Why is my pellet mill not feeding material into the die?
The most common causes are moisture out of range, particle size out of range, hopper bridging, feeder wear or mismatch, feeder position out of alignment, roller clearance out of adjustment, die blockage, and motor overload. Diagnosis should follow the material path from storage to die.
Can high moisture stop a pellet mill from feeding?
Yes. High moisture makes material sticky and heavy, causes bridging and sticking, reduces friction in the die, and can block die holes. In severe cases the feeder runs but no material reaches the die chamber.
Can low moisture also cause feeding problems?
Yes. Very dry material is light and dusty, does not compact well in the feeder screw, and can fluidize and leak back through the feeder. It also reduces binding in the die and increases fines.
How do I check if the feeder is the problem?
Run the feeder without the main motor and observe whether material moves at a steady rate. Check screw wear, pitch condition, discharge opening, and variable frequency drive setting. If the feeder moves material steadily but the die chamber does not fill, the problem is likely in the die chamber, roller clearance, or feeder position.
What should I do if the die chamber is blocked?
Stop the mill, lock out the power, and clean the die chamber and die holes according to the supplier procedure. Then correct the moisture or compression ratio that caused the blockage, and run the mill at reduced rate until output is stable.
How can I prevent feeding problems in the future?
Test feedstock moisture and particle size before each run, match the feeder to the feedstock, check feeder position and alignment, check roller clearance and die condition at planned intervals, warm up the die before full rate, run out or clean the die at shutdown, and keep a log of feedstock, feed rate, motor current, and output.