Pellet Mill Die Ring Replacement 800-1200h | Maintenance Guide
News 2026-06-25
Product Definition
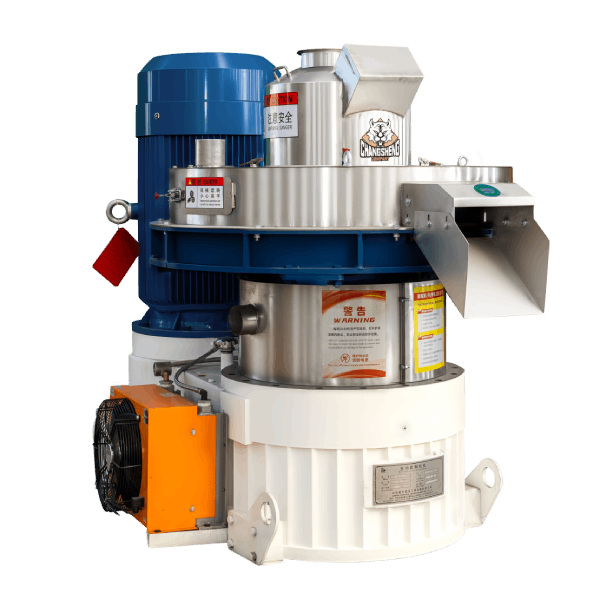
A pellet mill die ring replacement refers to the scheduled maintenance procedure of removing a worn ring die and installing a new or reconditioned die in a pellet mill. The ring die is the core wear component that forms pellets under high pressure, requiring periodic replacement based on hole wear, production output, and pellet quality degradation.
Technical Specifications & Performance Parameters
| Parameter | Value Range / Specification |
|---|---|
| Throughput capacity | 0.5 – 5.0 t/h (feedstock-dependent) |
| Main motor power | 30 – 160 kW (IE3 / IE4 compatible) |
| Ring die outer diameter | 400 – 800 mm |
| Ring die inner diameter | 300 – 700 mm |
| Die hole diameter (new) | 2.5 – 12.0 mm |
| Die hole diameter (rejection) | New diameter + 0.15 – 0.20 mm |
| Die thickness | 40 – 80 mm |
| Typical die life (feed) | 800 – 1,200 operating hours |
| Typical die life (biomass) | 600 – 1,000 operating hours |
| Die weight | 80 – 400 kg |
| Replacement time (standard) | 2 – 4 hours |
| Replacement time (quick-change) | ≤ 45 minutes |
| Raw material moisture | 12% – 18% |
| Specific energy consumption | 26 – 38 kWh/t (increases as die wears) |
| Recommended die change interval | Die life hours – 100 hours (proactive) |
Structural Composition & Material Selection
The pellet mill ring die comprises precision-engineered components with defined material grades:
Ring Die Assembly
- Die body: Forged alloy steel (20CrMnTi) or stainless steel (304/316L)
- Hardened surface: Carburised layer HRC 58–62 (alloy steel)
- Die hole geometry: Compression ratio 1:4 – 1:12, inlet taper 30°–60°
- Pilot bore: Precision-machined for shaft fit (H7 tolerance)
- Drive slots: Keyed or bolted connection to die holder
Die Retaining System
- Die clamp ring: Forged steel with hardened surface
- Retaining bolts: Grade 12.9, torque to specified value (300–800 Nm)
- Locating pins: Precision-ground, matched to die holes
Replacement Components
- Replacement die: New or reconditioned (matched to original specs)
- New O-rings/seals (for die holder interface)
- Anti-seize compound (for bolt threads)
Manufacturing Process – Engineering Workflow
Step 1 – Production Monitoring & Die Wear Assessment
Monitor pellet diameter weekly. Track die operating hours. When pellet diameter exceeds tolerance (new + 0.15mm) or production output drops >5%, schedule replacement.
Step 2 – Machine Shutdown & Lockout
Stop pellet mill. Apply lockout/tagout to motor and feeder. Allow machine to cool (minimum 30 minutes if hot). Clean die chamber area.
Step 3 – Die Release & Removal
Remove guard doors. Loosen and remove retaining bolts (criss-cross pattern). Install lifting eye in die. Use die removal tool or hoist to extract die. Inspect die holder for wear/damage.
Step 4 – Die Holder & Chamber Cleaning
Clean die holder bore and mounting surfaces. Remove old gasket material. Inspect drive slots and shaft for wear. Clean die chamber interior.
Step 5 – New Die Installation
Apply anti-seize compound to holder surfaces. Position new die using guide pins. Install retaining bolts (cross-tighten to specified torque). Install new O-rings/seals. Reinstall guards.
Step 6 – Post-Installation Check
Rotate die manually to verify free rotation. Set roller gap to 0.15–0.30mm. Reconnect power. Run dry for 30 seconds (no material) to check alignment. Start production with gradual feed.
Industry Comparison – Die Replacement Approaches
| Approach | Change Time | Downtime Cost | Skill Required | Typical Application |
|---|---|---|---|---|
| Standard Bolt-On Replacement | 2 – 4 hours | Moderate | Technician | All pellet mills |
| Quick-Change System | ≤ 45 minutes | Low | Operator | Frequent product changes |
| On-site Reconditioning | 4 – 6 hours | High | Specialist | Emergency situations |
| Factory Reconditioning | 2 – 4 weeks (shipping) | Very High | Factory | Scheduled rebuilds |
| Die Flip (Reversible) | 2 – 4 hours | Moderate | Technician | Double-sided dies |
Differentiation (Shandong Changsheng Machinery):
Our die replacement protocol is designed for minimal downtime – with clear torque specifications and step-by-step instructions. Quick-change die systems reduce replacement time to under 45 minutes, saving 1–3 hours per die change. All dies are supplied with matched dimensional specifications, eliminating the need for post-installation adjustment. Reconditioned dies are available at 40%–60% of new die cost, with guaranteed hole tolerance and hardness.
Application Scenarios by Buyer Role
Distributors / Importers
Focus on die stock levels and lead times for replacement dies. Require die life data for customer stocking recommendations.
EPC Contractors
Integrating die change access into plant layout. Need die handling equipment specifications. Require die storage and maintenance area planning.
Engineering Consultants / Technical Advisors
Evaluate die replacement impact on production availability. Require die life and cost data for operational cost modelling.
End-user Production Facilities
Operating 24/7 production. Demand minimal die change downtime and reliable die performance. Need clear replacement procedures for maintenance team.
Core Pain Points & Engineering Solutions
Pain Point 1 – Die change takes too long ( >3 hours)
Root cause: Inexperienced operators, seized bolts, poor access, lack of handling equipment.
Solution: Quick-change die system reduces time to ≤45 minutes. Die handling tools (hoist, removal tools) included. Documented procedure reduces errors.
Pain Point 2 – Die removal difficulty (stuck die)
Root cause: Expansion/contraction, corrosion, or material compaction holds die in holder.
Solution: Anti-seize compound on holder surfaces. Die removal tool with jacking screws. Maintain clean holder surfaces between replacements.
Pain Point 3 – Premature die failure ( <500 hours)
Root cause: Incorrect feedstock (abrasive), improper compression ratio selection, poor maintenance (roller gap too tight).
Solution: Select correct die hardness and compression ratio for feedstock. Maintain roller gap at 0.15–0.30mm. Monitor feedstock moisture.
Pain Point 4 – Torque specification errors causing bolt failure
Root cause: Insufficient or uneven bolt torque leads to die movement or bolt breakage.
Solution: Provide torque specification (300–800 Nm depending on bolt size). Use torque wrench. Cross-tightening pattern ensures even load.
Critical Risk Warnings & Mitigation Measures
Risk 1 – Incorrect torque causing die movement or bolt failure
Mitigation: Use calibrated torque wrench. Follow cross-tightening pattern. Re-torque after first 8 hours of operation. Mark bolts after torquing.
Risk 2 – Die dropping during removal
Mitigation: Always use lifting eye and hoist for heavy dies (>100kg). Never place hands under die during removal. Use die removal tool to break die from holder.
Risk 3 – Improper die orientation leading to damage
Mitigation: Mark orientation before removal. Use guide pins for installation. Document die orientation in maintenance records.
Procurement Selection Guide – 7 Executable Steps
Step 1 – Record existing die specifications
Measure die diameter, hole diameter, compression ratio, thickness. Note part number and supplier. Keep record for re-ordering.
Step 2 – Calculate remaining die life
Track die operating hours. Compare to typical life (800–1,200 hours). Order replacement when 100 hours remaining to avoid unplanned downtime.
Step 3 – Select replacement die type
New die (full life) or reconditioned die (40–60% of new cost, 80% of life). Die hardness (HRC) matched to feedstock.
Step 4 – Verify die dimensions with pellet mill
Confirm outer diameter, inner diameter, thickness, hole size, and bolt pattern match pellet mill. OEM-supplied dies guarantee fit.
Step 5 – Plan die change schedule
Coordinate with production schedule – change during planned maintenance or shift change. Allow 2–4 hours (standard) or 45 minutes (quick-change).
Step 6 – Prepare tools and equipment
Torque wrench, die removal tool, hoist/lifting equipment, anti-seize compound, replacement bolts, O-rings, cleaning supplies.
Step 7 – Train maintenance team
Conduct training session on die change procedure. Provide step-by-step documentation. Supervise first replacement after training.
Engineering Case Study – Feed Mill in Vietnam
Project Background
A poultry feed mill in Dong Nai operates a 75kW pellet mill at 2.5 t/h. Die changes occurred every 800–1,000 hours – 3–4 changes annually. Each change required 3–4 hours downtime.
Initial Problem
Die changes averaged 3.5 hours – causing 14+ hours downtime annually at $500/hour production value ($7,000 annual lost production). Bolts frequently seized, requiring cutting.
Root Cause Analysis
No documented procedure. Operators used varied techniques. Bolts lacked anti-seize compound. Hoist not available – manual lifting risked injury. Die orientation not recorded.
Solution Implemented
Introduced Shandong Changsheng die replacement procedure with torque specifications. Supplied torque wrench, anti-seize compound, and die removal tool. Trained 4 maintenance staff. Procured 500kg hoist for safe lifting.
Final Data Results (12-month average)
| Metric | Before (No Procedure) | After (Documented Procedure) |
|---|---|---|
| Average die change time | 3.5 hours | 1.8 hours (-49%) |
| Bolt seizure incidents | 4/year | 1/year |
| Annual downtime (die changes) | 14 hours | 7.2 hours |
| Annual production loss | $7,000 | $3,600 |
| Safety incidents | 1 near-miss | 0 |
Frequently Asked Questions (FAQ)
1. How often should I replace the pellet mill die ring?
Typically every 800–1,200 operating hours for feed production, 600–1,000 hours for biomass. Monitor pellet diameter and output.
2. What are the signs of die ring wear?
Increased pellet diameter (+0.15mm+), reduced output (>5%), higher specific energy, PDI drop below target, visual hole wear.
3. How long does die ring replacement take?
Standard bolt-on: 2–4 hours. Quick-change system: ≤45 minutes. First replacement may take longer.
4. Can I replace the die ring myself?
Yes – with proper training, tools, and lifting equipment. Follow documented procedure. Ensure lockout/tagout before work.
5. What torque specification is required for retaining bolts?
300–800 Nm depending on bolt size (M16–M30). Consult maintenance manual. Cross-tightening pattern required.
6. Should I replace the die or recondition it?
New die for full life. Reconditioned die for 40–60% of cost (80% life). Choose based on budget and production requirements.
7. What is the cost of die ring replacement?
New die cost varies by diameter and hole count – contact factory for pricing. Reconditioned dies available at reduced cost.
8. What tools are required for die replacement?
Torque wrench, die removal tool, hoist/lifting equipment, anti-seize compound, replacement bolts, O-rings, cleaning supplies.
9. What should I inspect during die replacement?
Die holder wear, shaft condition, drive slots, roller condition. Clean and inspect all mating surfaces.
10. How do I store spare dies?
Store in dry area (RH <60%) with anti-rust protection. Rotate inventory (FIFO). Mark orientation and specifications on die.
11. What is the die ring made of?
Forged alloy steel (20CrMnTi) with carburised hardened layer (HRC 58–62) or stainless steel (304/316L) for corrosive applications.
12. Can I flip the die ring to extend life?
For reversible dies – yes (rotate 180°). Not all dies are reversible – check manufacturer specification.
📄 Get the complete die replacement procedure document with torque specifications, inspection checklists, and safety instructions.
[Get PDF Technical Datasheet]
Author & E-E-A-T Credentials
Author: Dr. Chen Wei
Title: Senior Mechanical Engineer, Pelletising Systems Division
Experience: 14 years in biomass densification and feed processing equipment design
Notable Projects:
- Developed die replacement training programme for 20+ feed mills across Asia (2016–2025)
- Authored die life extension protocol for high-silica feedstocks
- Co-author of “Industrial Pellet Mill Maintenance and Optimisation” (Engineering Press, 2022)
Affiliation: Shandong Changsheng Machinery Co., Ltd.