Pellet Mill Rattling Noise: Causes, Diagnosis and Fixes
News 2026-11-17
A rattling noise in a pellet mill is the sound of something loose vibrating against something else. It is different from a grinding, scraping or knocking sound, and the difference matters because a rattle usually points to a different set of causes.
The first decision is whether to stop or investigate while running. A rattle from a guard or panel can be located with the mill running, from outside. A rattle from the die chamber, the coupling, the bearing or the drive requires a stop, because those components are inside the machine or attached to rotating parts.
This article covers how to tell rattling from other abnormal noises and from normal vibration, the situations where a rattle most often appears, where rattles originate, how to locate the source, when to stop immediately, what to check and how, and what to confirm when buying a mill.
Normal Vibration vs a Rattle
Before treating a sound as a rattle, it helps to know what normal sounds like.
A pellet mill in normal operation vibrates. The vibration is steady, it is present under load, it does not transmit strongly into the floor, and it does not produce a metallic or plastic-on-metal tapping sound. Normal vibration may be felt on the frame and on the base, and it may change slightly with feed rate or material.
A rattle has these characteristics:
- A light, rapid, metallic or plastic-on-metal tapping or vibration, distinct from the steady machine hum
- Often intermittent — it comes and goes with speed, load or material
- Often localised — it can be traced to a specific panel, guard, mount or area
- Sometimes accompanied by a visible movement of the part that is rattling
If the sound is a steady hum or the normal sound of material in the die, it is not a rattle. If it is a distinct tapping or vibration that was not there before, it is.
The Five Situations Where a Rattle Most Often Appears
Most rattle reports fall into one of these five cases. The case narrows the cause quickly.
After a die or roller change
A rattle that appears after a die or roller change usually points to a die bolt that was not torqued correctly, a scraper that was not refitted in position, or a guard that was not refastened after the work. Check the die bolts, the scraper and the guards before looking anywhere else.
After maintenance on the drive
A rattle that appears after work on the coupling, the motor or the gearbox usually points to a fastener that was not tightened, a coupling element that was not seated, or a guard that was left loose. Check the drive and the guards first.
After fitting or replacing anti-vibration mounts
A rattle that appears after mount replacement usually means the mount is the wrong specification, is not seated correctly, or the foundation bolts were not re-torqued after the new mounts were fitted.
On startup after a stop
A rattle on startup, before material is flowing, usually points to a loose guard or panel that vibrates in the empty machine, or to a component that shifted during the stop. Check the guards and the fasteners first.
During normal running, with no recent work
A rattle that appears in a mill that has been running normally is usually a fastener that has loosened under vibration, an anti-vibration mount that has failed, or a bearing that has developed play. Check fasteners, mounts and bearings, in that order.
Where Rattles Most Often Originate
Most pellet mill rattles come from a small number of places. The list is ordered by how easy each is to check, so that the easy checks come first.
| Source | How it sounds | How to check |
|---|---|---|
| Loose guard or access panel | Light, rapid rattle from a specific panel or cover | Press the panel lightly with the mill running; if the rattle stops or changes, the panel is the source |
| Loose bolt or fastener on the frame, mount or feeder | Rattle from a specific area, sometimes rhythmic | Check fasteners in the area after isolating |
| Failed anti-vibration mount | Rattle from the base or frame, often worse at certain loads | Inspect mounts for collapse or hardening |
| Loose coupling or drive component | Rattle from the drive end, often with vibration | Check coupling condition and alignment |
| Bearing with play | Rattle from the bearing housing, often with a rumble underneath | Check bearing play, temperature and noise |
| Loose die bolt or scraper | Rhythmic rattle or knock, once per revolution | Check die bolts and scraper after isolating |
| Loose feeder or hopper component | Rattle from the feeder area, sometimes with flow changes | Inspect feeder and hopper after isolating |
| Broken shear pin or safety pin | Rattle from the coupling area, often after an overload event | Inspect the coupling and the shear pin |
Guards and panels are checked first, because they are easy to check and a common source. Bearings and die bolts are checked later, because they require isolation and access.
Diagnosing the Rattle
Work through these steps. The first two can be done with the mill running, and the rest require a stop and isolation.
- Locate the area with the mill running. Walk around the machine and listen. Press lightly on guards and panels — if the rattle stops or changes, the source is that panel. Do not reach into or under guards.
- Note the conditions. Does the rattle change with speed, load or material? Does it appear only at startup, only under load, or continuously? This narrows the cause.
- Establish which of the five situations applies. After a die or roller change, after drive work, after mount replacement, on restart, or during normal running. This narrows the cause fastest.
- Stop, isolate and lock out. Before opening anything, confirm zero energy.
- Check guards and panels. Tighten fasteners and replace missing or damaged fixings.
- Check frame, mount and feeder fasteners. Tighten as required, and check for fasteners that have loosened twice, which indicates a vibration problem rather than a single loose bolt.
- Check the anti-vibration mounts for collapse, cracking or hardening.
- Check the coupling, drive and shear pin. Look for loose fasteners, worn elements, misalignment and a broken shear pin.
- Check the bearings. Roller bearings: turn by hand and feel for play or roughness. Main shaft bearings: check play, temperature and noise at the housing.
- Check die bolts and scraper. Look for loose or missing bolts, and for a scraper that has shifted or broken.
- Check the feeder and hopper. Look for loose components and for flow problems that could be causing a rattle by starving the mill.
If the rattle persists after all of these have been checked, the source is likely inside the rotating assembly and should be investigated with the manufacturer’s guidance.
Fastener Loosening vs Mount Failure
A rattle from the base can come from a loose foundation bolt or from a failed anti-vibration mount, and the two need different fixes.
Loose foundation bolt. The bolt can be turned by hand or with light force, or the torque wrench shows it below specification. The fix is to re-torque to the specified value and check again after the next running period.
Failed anti-vibration mount. The mount has collapsed (the machine sits lower than before), cracked, or hardened (it no longer deflects under load). A hardened mount transfers vibration into the floor, which also loosens the bolts. The fix is to replace the mounts, not to keep tightening the bolts.
If bolts loosen repeatedly after re-torquing, the mount is the more likely cause. Tightening the bolts again without replacing the mounts will reproduce the problem.
When to Stop Immediately
Some rattles can be located while the mill runs; others cannot.
Can be checked with the mill running (from outside, without reaching into guards):
- A rattle from a guard or panel
- A rattle from a frame or feeder component
- A rattle from the base or mount
Stop immediately for:
- A rattle from the die chamber or from the drive end
- A rattle accompanied by vibration, heat, a change in motor current or a drop in pellet quality
- Any rattle from a component that has visibly moved or broken
- A rattle that appeared after an overload event, which may indicate a broken shear pin
Safety before opening anything. Stop the feeder and the main motor, isolate and lock out the drives, and confirm zero energy before opening the die chamber, removing a guard or reaching into any part of the machine. The die and rollers are hot after running. Follow the site’s lockout/tagout procedure. This applies to every check described below.
What to Check and How
Guards and panels
Check every fastener on every guard and access panel. A missing bolt, a stripped thread or a loose latch is a common cause of a rattle, and it is easy to fix. A guard that can detach while the mill is running is a hazard, not just a noise.
Frame, mount and feeder fasteners
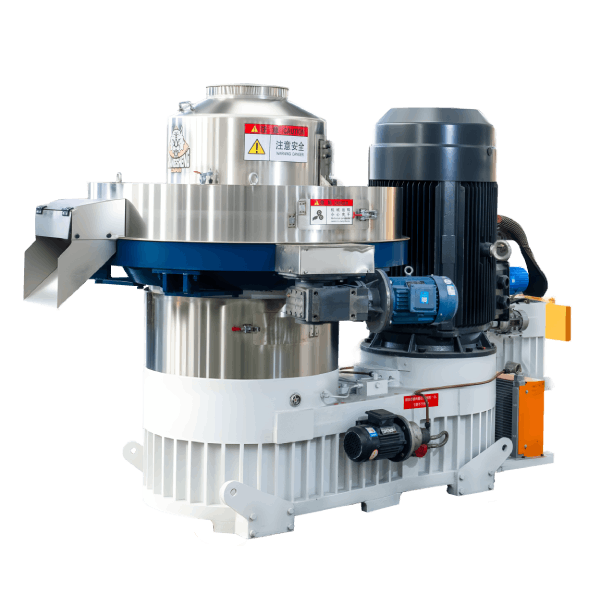
Check the fasteners that hold the machine to its base, the base to the floor, and the feeder to the mill. Tighten to the specified torque and check again after the next running period. A fastener that loosens twice is telling you that the vibration source is still there.
Anti-vibration mounts
Inspect the mounts for collapse, cracking or hardening. A mount that has hardened transfers vibration instead of isolating it, and a mount that has collapsed allows the machine to move. Both produce a rattle and both should be replaced, not shimmed.
Coupling, drive and shear pin
Check the coupling for loose fasteners, worn elements and misalignment. Check the shear pin or safety pin for breakage, because a broken pin leaves the coupling free to rattle and indicates that the mill experienced an overload. A misaligned coupling produces a rhythmic rattle at the drive end, often with vibration.
Bearings
Roller bearings: turn the roller by hand and feel for play, roughness or binding. Main shaft bearings: check for play at the housing, and check the housing temperature after running against previous readings. A bearing that is rattling may have developed play, and a bearing with play should be replaced rather than monitored.
Die bolts and scraper
Check the die bolts for looseness and correct torque, and check the scraper for breakage, shift or wear. A loose die bolt or a shifted scraper produces a rhythmic rattle that repeats with the die or roller rotation.
Feeder and hopper
Check for loose components on the feeder and hopper. A feeder that is starving the mill produces a rumble that stops when material flow stops, which can be mistaken for a rattle. Check the material flow and the feeder condition together.
Ring Die and Flat Die Differences
The rattle sources are similar on both machine types, but the frequency differs.
| Rattle source | More common on ring die mills | More common on flat die mills |
|---|---|---|
| Guard and panel | Common | Common |
| Die bolt | Common | Less common |
| Scraper | Common | Common |
| Roller bearing | Common | Common |
| Coupling and drive | Depends on the drive type | Depends on the drive type |
| Shear pin | Where fitted | Where fitted |
| Feeder | Common | Common |
On both types, confirm the actual drive arrangement, roller mounting and guard design on the specific machine before deciding which component to check first. The same rattle can come from a different component on two different machines.
Recording the Sound for a Remote Diagnosis
A recording is often more useful than a written description, because the character, rhythm and location of the rattle are hard to put into words.
- Record in a quiet moment. Reduce background noise as far as is practical.
- Record the mill empty first. With the feeder off, record 30 to 60 seconds. This captures the rattle without material.
- Record under load second. With the feeder on and the mill at normal load, record another 30 to 60 seconds.
- Move the phone or recorder close to the suspected area. Record near the panel or guard, then near the base, then near the drive end. The change in loudness across the recordings helps locate the source.
- Note the conditions. Write down the time, the mill load, the material and whether the rattle was constant or intermittent.
- Send the recordings with the machine model and what changed before the rattle appeared. A technician can compare the recordings with known patterns and ask follow-up questions.
Preventing Rattles
- Check guard and panel fasteners at each scheduled maintenance, and after any work that involves removing a guard.
- Check frame, mount and feeder fasteners at each scheduled maintenance, and re-torque to the specified value.
- Inspect anti-vibration mounts at defined intervals and replace them when they show collapse or hardening.
- Check coupling alignment and the shear pin after any drive work.
- Check bearing play and temperature at each shift, and record the readings so a trend is visible.
- Check die bolts and scraper at each die change and at defined intervals.
- Train operators to distinguish a rattle from a grinding or scraping noise, and to treat a rattle from the die chamber or drive end as a stop condition.
Spare Parts Planning
- Guard and panel fasteners. Keep a small stock of the fasteners used on guards and panels, with the correct specification.
- Anti-vibration mounts. Mounts fail and should be available, because a collapsed mount cannot be repaired in place.
- Coupling elements and shear pins. These are consumables and should be on hand, particularly the shear pin, which is designed to break.
- Bearing sets. Roller and main shaft bearings should be available for the planned maintenance interval.
- Die bolts and scrapers. These are small, inexpensive parts that prevent a large problem.
What to Confirm When Buying a Mill
Guard and panel design. Confirm the guards and panels are fixed with fasteners that do not loosen easily, and that they can be removed and refitted without special tools.
Mount specification. Confirm the anti-vibration mounts are specified for the machine’s dynamic load, and that replacements are available.
Bearing access and specification. Confirm the bearings can be inspected and replaced without dismantling the whole machine.
Fastener specification. Confirm the frame and mount fasteners are specified for the vibration environment, and that the torque values are documented.
Shear pin specification. Where a shear pin is fitted, confirm its rating and that spares are available.
Wear parts availability. Confirm die bolts, scrapers, bearings and mounts are available with reasonable lead times.
Acceptance testing. Confirm the mill is run with your material at the intended feed rate, and that abnormal noises are investigated before acceptance.
If a rattle has appeared and the source is not clear from the checks above, note where it comes from, whether it changes with speed or load, what changed before it appeared, and record the sound as described above. Send that information with the machine model, and the likely source can be narrowed down before a site visit.
AUTHOR / COMPANY INFORMATION
Shandong Changsheng Machinery Co., Ltd. is a manufacturer of biomass pellet production equipment, including ring die pellet mills, complete pellet lines and related process equipment, serving overseas importers, EPC contractors, engineering companies and biomass fuel producers.