Press Roller Not Turning: Causes and Fixes
News 2026-11-16
A press roller that is not turning is a mechanical fault until proven otherwise. When the roller stops rotating, the die drags material past a stationary roller instead of pressing it through the holes. Output collapses, and the roller, the die and the roller shaft wear against each other.
The cause is usually one of five things: a seized or failed roller bearing, a roller that is not seated or locked, a worn roller shaft, material packed between roller and die, or foreign matter jammed in the gap. The first move is the same in every case: stop the mill, isolate it, and do not force the roller to turn under load.
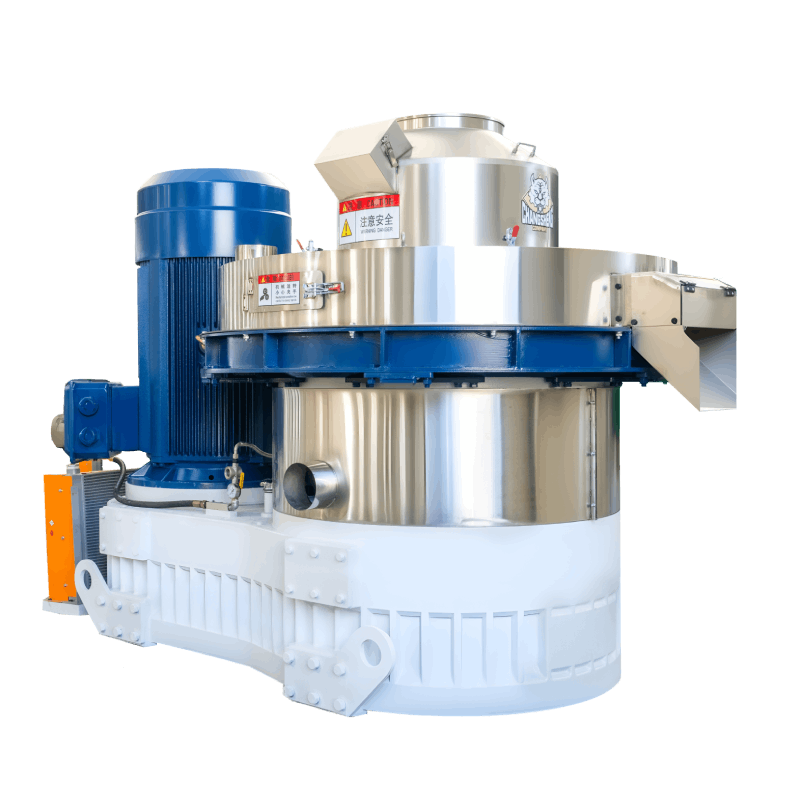
This article covers how to tell a roller that has stopped turning from one that is slipping, the four situations where it most often happens, the mechanical causes, how to free a seized roller safely, how to check the bearing, what the stationary roller does to the die, and what to confirm when buying a mill or a roller set.
What “Roller Not Turning” Actually Means
How a press roller is driven depends on the machine type, and that decides what “not turning” tells you.
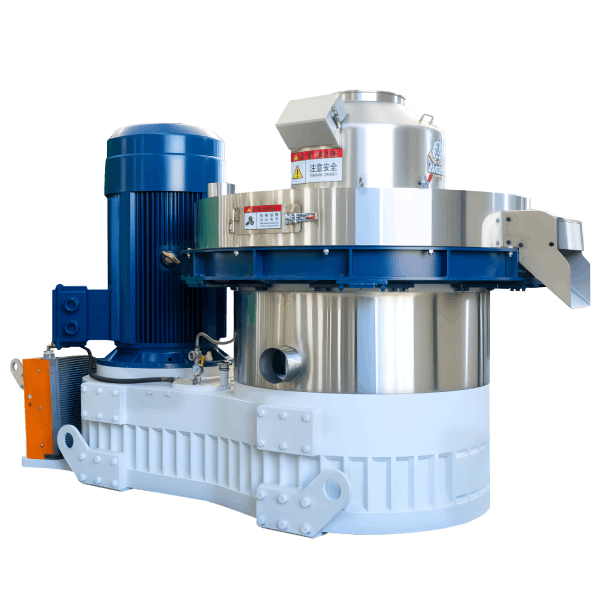
On a ring die mill, the die is driven and the rollers are dragged round by the material between roller and die. The roller has no drive of its own. A roller that does not turn is either mechanically prevented from turning, or there is no material between roller and die to drag it round.
On a flat die mill, the rollers are often driven directly and the die is stationary or separately driven. A roller that does not turn here points first to the drive, the bearing or a jam, because the roller is not relying on material to turn it.
In both types the practical test is the same: with the mill isolated, turn the roller by hand.
Mechanical stop. The bearing has seized, the roller is jammed, or the shaft has worn so the roller binds. The roller will not turn by hand.
No drive from material. The roller turns freely by hand, but during running there is no material to drag it round. This is not a roller fault; it is a feed or material problem upstream.
Checking whether the roller turns freely by hand separates these two immediately, and it is the first thing to do before opening anything else.
Roller Not Turning vs Roller Slipping
These are related but different, and the fix differs.
Roller not turning. The roller is stationary while the die or the material moves past it. In the mechanical case it will not turn by hand. Output stops.
Roller slipping. The roller turns, but slower than it should, or intermittently, because it cannot grip the material. It turns freely by hand. Slip is a material, gap or surface problem.
The hand test separates them: a roller that will not turn by hand has a mechanical fault; a roller that turns freely but does not turn during running has a feed or material fault.
The Four Situations Where It Most Often Appears
Most “roller not turning” reports fall into one of these cases. The case narrows the cause quickly.
After a roller change
A roller that will not turn immediately after replacement is almost always a seating or locking problem, or a clearance set too tight. Check the roller is seated and locked according to the manufacturer’s procedure, and check the clearance on every station before looking anywhere else.
After a die change
A die that has been changed can bind a roller if the die is not seated flat, if the clearance was set against the old die, or if material from the change was left in the chamber. Check the die seating, the flange condition and the clearance after any die change.
On restart after a stop
A roller that will not turn on restart usually means material set in the chamber while the mill was stopped and has locked the roller. This is the case where purging before the stop would have prevented the problem. Clear the set material before trying to turn the roller.
After clearing a blockage
A roller that will not turn after a blockage was cleared can mean the blockage was only partly removed, or that material packed around the roller during the blockage has set. Re-open the chamber and check the full roller circumference, not only the area where the blockage was visible.
Mechanical Causes
Seized or failed roller bearing
A bearing that has lost lubrication, taken on dust or overheated will seize or bind. The roller may turn stiffly by hand, or not at all. Among the mechanical causes, the bearing is the one to check first, because it usually gives warning before it fails, it can be prevented by lubrication and contamination control, and a seized bearing damages the shaft and the roller as well as stopping the mill.
Roller not seated or not locked
A roller that is not seated correctly sits off-centre and binds against the die or the roller mounting. It may turn freely at one point and lock at another. This is common after a roller change if the mounting was not set according to the manufacturer’s procedure.
Worn roller shaft
A worn shaft lets the roller sit off-centre, which loads the bearing unevenly and eventually seizes it. Shaft wear is material-dependent and higher on abrasive material and on machines run with an incorrect roller gap.
Material packed between roller and die
Material that has packed and hardened between roller and die can lock the roller in place. This follows a blockage that was not cleared, a stop without purging, or wet material that set in the chamber.
Foreign matter
A piece of metal, stone or hard material lodged between the roller and the die can jam the roller. This is often sudden and is one of the few cases where the cause is obvious once the chamber is opened.
Incorrect roller clearance
A clearance that is too small loads the roller against the die and can lock it, particularly when the die is cold or when material is packed. Clearance that is too large does not stop the roller but lets it slip.
Bearing Warning Signs to Watch
A bearing that is failing gives warning before it seizes, and the warning is measurable.
- Temperature. Check the bearing housing with a contact thermometer or an infrared thermometer at each shift. A bearing that runs noticeably hotter than the others on the same machine, or hotter than its own previous readings, is failing. Record the readings so a trend is visible.
- Noise. A failing bearing becomes noisy before it seizes. Listen at the roller with the mill running and material present. Grinding, rumbling or intermittent clicking that was not there before is a warning.
- Vibration. A bearing with play or a damaged race vibrates. Hand contact on the bearing housing, or a vibration reading where available, shows a change before seizure.
- Play. With the mill isolated, check the roller for radial and axial play. Play that was not there at the last inspection means the bearing is worn.
- Lubrication condition. Check the lubricant for contamination, discolouration and water. Contaminated or degraded lubricant is a leading cause of bearing failure, and it is visible before the bearing fails.
A bearing that shows any of these signs should be replaced at the next planned stop, not left until it seizes.
Diagnosing a Roller That Will Not Turn
Work through these in order with the mill stopped and isolated.
- Isolate and lock out. Confirm zero energy before opening the die chamber.
- Establish which of the four situations applies. After a roller change, after a die change, on restart, or after a blockage. This narrows the cause fastest.
- Turn the roller by hand. If it will not turn, the fault is mechanical. If it turns freely, the fault is feed or material.
- Check for packed material or foreign matter between roller and die. This is the quickest cause to confirm and the easiest to clear.
- Check the roller is seated and locked according to the manufacturer’s procedure.
- Check the bearing for play, stiffness and heat. A bearing that is hot after running, or stiff by hand, is failing.
- Check the roller shaft for wear and for off-centre seating.
- Check the roller clearance on every station and reset it to the procedure.
If the roller turns freely by hand and the chamber is clear, the problem is feed or material, and the roller itself is not at fault.
Freeing a Seized Roller Safely
What not to do:
- Do not force the roller to turn with a bar or lever while the mill is under load. It can shear the shaft, crack the roller or damage the die.
- Do not run the mill with a roller that is not turning. The die and roller wear against each other, and the shaft and bearing are damaged further.
- Do not apply heat to free a seized bearing in place. It changes the bearing and shaft dimensions and can cause a failure later.
- Do not assume the roller is worn and replace it before checking the bearing, seating and shaft. A new roller on a seized bearing will seize again.
What to do:
- Stop, isolate and lock out.
- Remove packed material and any foreign object from between roller and die, working from the outer edge inward and not prying against the die surface.
- On a ring die mill, the roller is free to be turned by hand once the material is removed; on a flat die mill, check that the roller drive is disengaged or isolated before turning the roller by hand.
- Try the roller by hand again. If it now turns freely, the cause was packed material or foreign matter.
- If it still will not turn, remove the roller according to the manufacturer’s procedure and inspect the bearing and shaft.
- Replace a seized or damaged bearing, and replace the roller shaft if it is worn.
- Reset the roller clearance on every station before restarting.
- Restart at reduced feed rate, warm the die, and watch the roller rotation and load.
What a Stationary Roller Does to the Die and the Roller
The damage spreads beyond the roller.
- The die wears locally, because the area under the stationary roller is not receiving material at the same rate as the rest of the die.
- The roller surface flat-spots or scores, because it is being rubbed rather than rolling.
- The shaft and bearing take load without rotation, which accelerates wear and can overheat the assembly.
- Material packed around the stationary roller raises local temperature and can set hard, making the next start harder.
- Output and pellet quality fall, because the die is being worked by fewer effective rollers.
After a stationary roller has been freed or replaced, the die should be inspected before the mill returns to full rate. Check:
- Whether the die holes in the affected area are blocked, and clear them through the full working length.
- Whether the die working surface in that area is scored or polished, which changes how material is drawn in.
- Whether the wear in that area is noticeably greater than on the rest of the die, which indicates localised damage rather than normal wear.
- Whether the roller clearance can be set correctly on that station with the die in its current condition.
A die that has been run with a stationary roller for a period may need more than clearing, and the affected area should be compared with the rest of the die before production resumes.
Prevention and Maintenance
- Lubricate the roller bearings on schedule, using the specified lubricant and quantity. Too little lubricant causes metal-to-metal contact and seizure; too much can raise temperature and blow seals. The correct quantity and interval are in the manufacturer’s manual, and they differ with bearing size and operating conditions.
- Check roller rotation at every start and at each shift. A roller that is slowing down is easier to deal with than one that has stopped.
- Check bearing temperature at each shift and record it, so a trend is visible before failure.
- Listen for bearing noise with the mill running and material present.
- Keep the roller clearance correct on every station and recheck it after any roller or die change.
- Clear blockages fully before restarting, and never leave packed material in the chamber.
- Purge the die before planned stops, so material does not set and lock the rollers.
- Keep foreign matter out with screening and magnet protection upstream.
Spare Parts Planning
- Roller bearings. Hold a spare set, because bearing failure stops the line and the part may not be locally available.
- Roller shafts. A worn shaft is found at the same time as a failed bearing, and having one on hand shortens the stoppage.
- Rollers and roller shells. Keep the current specification and surface form recorded.
- Seals and lubricants. The specified lubricant and the seals that keep contamination out are part of bearing life.
- Die. A die that has run with a stationary roller should be inspected, and a spare may be needed if the affected area is damaged.
What to Confirm When Buying a Mill or Roller Set
Roller mounting and clearance adjustment. Confirm the method is repeatable and accessible without dismantling the die chamber, and that it can be set on every station.
Bearing specification and lubrication. Confirm the bearing type, the lubrication method and the recommended interval, and that the bearings are accessible for replacement.
Roller shaft material and hardness. Confirm the shaft specification suits your material’s abrasiveness.
Roller surface form. Confirm the surface form suits your material’s friction characteristics.
Wear parts availability. Confirm roller, bearing and shaft availability, lead time and cost.
Acceptance testing. Confirm the mill is run with your material at the intended feed rate, and that roller rotation is observed and recorded.
If a press roller has stopped turning and the cause is not clear from the checks above, send the machine model, roller and bearing condition, what changed before the failure and the load record, and the roller, bearing and clearance setup can be reviewed against the machine.
AUTHOR / COMPANY INFORMATION
Shandong Changsheng Machinery Co., Ltd. is a manufacturer of biomass pellet production equipment, including ring die pellet mills, complete pellet lines and related process equipment, serving overseas importers, EPC contractors, engineering companies and biomass fuel producers.