Pellet Mill Roll Shell Adjustment: 0.1-0.3mm Gap Guide
News 2026-05-26
1. Product Definition
Pellet mill roll shell adjustment sets the gap between roller shell and die surface (0.1-0.3mm for ring die, 0.2-0.5mm for flat die) using a feeler gauge, ensuring uniform compression across all rollers (2-4 rollers), preventing metal contact (gap too tight) or roller slip (gap too wide), performed weekly and after every die change.
2. Technical Parameters & Specifications
| Parameter | Ring Die Mill | Flat Die Mill | Effect of Incorrect Gap |
|---|---|---|---|
| Correct gap (mm) | 0.1 – 0.3 | 0.2 – 0.5 | N/A |
| Gap too tight (mm) | <0.05 | <0.1 | Metal contact → die scoring, cracks |
| Gap too wide (mm) | >0.5 | >0.8 | Roller slip → low output (30-50%) |
| Gap variation between rollers | ±0.05mm | ±0.1mm | Uneven die wear, vibration |
| Adjustment mechanism | Eccentric bolts | Jack screws or shims | |
| Number of rollers | 2 – 4 | 2 – 3 | |
| Adjustment frequency | Weekly, after die change | Weekly, after die change | |
| Time required | 10-20 minutes | 10-20 minutes | |
| Tool | Feeler gauge (0.05-1.0mm) | Feeler gauge |
For adjustment tools: Request a feeler gauge set and adjustment procedure for your mill.
3. Structure & Material Composition
Roll Shell Adjustment Components
Ring Die Mill
- Eccentric bolts (one per roller): Rotate to move roller toward or away from die
- Locking nuts: Secure adjustment after setting
- Feelers: Access through die cover
Flat Die Mill
- Jack screws: Raise or lower roller carriage
- Shims: Add or remove to adjust gap
- Access: Under die or through side door
Roller Shell
- Outer surface contacts material
- Hardness: HRC 58-62 (Cr26) or HRC 68-72 (tungsten)
- Width: 40-80mm
4. Manufacturing Process (Engineering Steps)
Step 1 – Stop mill and lock out/tag out
Disconnect power. Wait for die to cool (if hot).
Step 2 – Remove die cover
Access roller area.
Step 3 – Clean die and roller surface
Remove dust, debris. Clean surfaces ensure accurate measurement.
Step 4 – Measure current gap
Insert feeler gauge between roller and die. Should feel slight resistance.
Step 5 – Adjust eccentric bolts (ring die)
Loosen locking nut. Rotate eccentric bolt (1/8 turn increments). Re-check gap.
Step 6 – Adjust all rollers equally
Repeat for each roller (2-4). All gaps should be equal (±0.05mm).
Step 7 – Lock adjustment
Tighten locking nuts. Re-check gap (may change slightly).
Step 8 – Test run
Run mill empty, listen for metal contact (scraping noise). Adjust if needed.
5. Industry Comparison
| Adjustment Method | Time | Tools | Skill Level | Accuracy |
|---|---|---|---|---|
| Eccentric bolts (ring die) | 10-15 min | Wrench, feeler gauge | Medium | ±0.05mm |
| Jack screws (flat die) | 10-15 min | Wrench, feeler gauge | Medium | ±0.05mm |
| Shims (flat die) | 15-20 min | Wrench, feeler gauge, shim stock | Medium | ±0.02mm |
| Hydraulic auto adjust | 0 min (auto) | PLC | Low (automatic) | ±0.02mm |
| No adjustment (fixed) | N/A | None | N/A | Poor (uneven wear) |
| Why Choose Shandong Changsheng | Eccentric bolts standard | Lock nuts included | Feeler gauge included | Training video |
Compare adjustment methods: Request a recommendation for your mill type.
7. Core Technical Pain Points & Engineering Solutions
Pain Point 1 – Uneven Gap Between Rollers
Symptom: Uneven die wear (one side worn more). Vibration. Output fluctuation.
Root cause: Operator adjusted only one roller (not all).
Solution:* Adjust ALL rollers equally (2-4 rollers). Use feeler gauge on each. Target same gap (±0.05mm).
Pain Point 2 – Gap Too Tight (Metal Contact)
Symptom:* Scraping noise. Die surface scored. Roller shell damaged.
Root cause:* Gap <0.05mm.
Solution:* Stop immediately. Adjust gap to 0.1-0.3mm. Inspect die for damage.
Pain Point 3 – Gap Too Wide (Roller Slip)
Symptom:* Output low (30-50% loss). Motor load normal.
Root cause:* Gap >0.5mm.
Solution:* Adjust gap to 0.1-0.3mm. Output should increase 30-50%.
Pain Point 4 – Gap Changes During Operation
Symptom:* Output decreases over shift. Gap measured 0.2mm → 0.5mm.
Root cause:* Locking nuts loose.
Solution:* Torque locking nuts properly. Use thread locker (Loctite). Mark gap position.
8. Risk Warnings & Mitigation Strategies
Risk 1 – Die Damage from Metal Contact
Warning: Gap too tight (<0.05mm) → roller contacts die → die scoring, cracks. Replacement $2k-6k.
Mitigation:* Use feeler gauge (0.1-0.3mm). Run empty after adjustment, listen for scraping.
Risk 2 – Uneven Die Wear (Reduced Life)
Warning:* One roller gap different from others → uneven pressure → die wears on one side. Life reduced 30-50%.
Mitigation:* Adjust all rollers equally. Measure each with feeler gauge.
Risk 3 – Operator Forgets to Lock Bolts
Warning:* Adjustment made, locking nuts not tightened. Gap changes during operation.
Mitigation:* Torque locking nuts to spec. Mark position with paint. Checklist.
9. Procurement Selection Guide (6 Actionable Steps)
Step 1 – Identify your mill type
Ring die (eccentric bolts) or flat die (jack screws or shims).
Step 2 – Gather tools
Feeler gauge set (0.05-1.0mm). Wrench set. Torque wrench.
Step 3 – Stop mill and lock out
Disconnect power. Remove die cover.
Step 4 – Clean surfaces
Remove dust from die and roller.
Step 5 – Adjust each roller
Use feeler gauge. Target 0.1-0.3mm (ring die) or 0.2-0.5mm (flat die). All rollers equal.
Step 6 – Lock and test
Tighten locking nuts. Run empty, listen for scraping.
10. Engineering Case Study
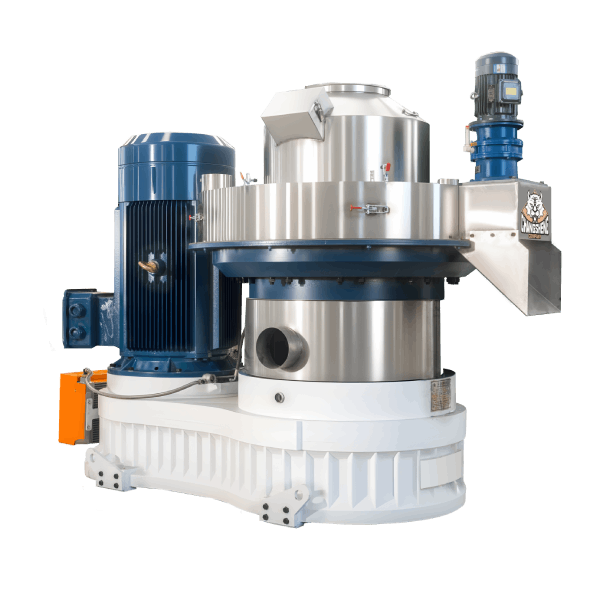
Project Background: A 2 t/h ring die pellet plant had output 1.2 t/h (40% loss). Vibration noticeable. Die wear uneven (one side 2mm, other 0.5mm).
Initial Problem: Output low, uneven die wear. Operator thought die defective.
Root Cause Analysis:
- Roller gaps: Roller 1: 0.2mm, Roller 2: 0.6mm, Roller 3: 0.2mm
- Uneven gap caused uneven pressure (roller 2 overloaded)
- Die wear uneven (roller 2 side worn more)
- Locking nuts loose (gap changed during operation)
Solution Implemented:
| Action | Result |
|---|---|
| Adjust all rollers to 0.2mm | Output increased to 1.9 t/h |
| Torque locking nuts | Gap remained stable |
| Mark positions | Easy verification |
Results:
| Metric | Before | After |
|---|---|---|
| Output (t/h) | 1.2 | 1.9 |
| Roller gaps (mm) | 0.2,0.6,0.2 | 0.2,0.2,0.2 |
| Die wear | Uneven (2mm vs 0.5mm) | Even |
| Vibration | Noticeable | Gone |
- Adjustment time: 15 minutes
- Output increase: 0.7 t/h × 5,000 hours = 3,500 tons × 150=525,000/year
Request a roll shell adjustment training: Contact engineering team with your mill model for video guide.
11. FAQ
Q1: What is pellet mill roll shell adjustment?
Setting gap between roller shell and die surface (0.1-0.3mm ring die) using feeler gauge.
Q2: How often to adjust roll shell gap?
Weekly and after every die change.
Q3: What is the correct gap for ring die?
0.1 – 0.3 mm. Use feeler gauge.
Q4: What is the correct gap for flat die?
0.2 – 0.5 mm.
Q5: What happens if gap is too tight?
Metal contact → die scoring, cracks, roller damage. Die replacement $2k-6k.
Q6: What happens if gap is too wide?
Roller slip → low output (30-50% loss).
Q7: How to measure gap?
Insert feeler gauge between roller and die. Should feel slight resistance.
Q8: How to adjust gap on ring die mill?
Loosen locking nut. Rotate eccentric bolt (1/8 turn). Re-check with feeler gauge.
Q9: How to adjust gap on flat die mill?
Turn jack screws or add/remove shims.
Q10: Do I need to adjust all rollers?
Yes – all rollers (2-4) must have equal gap (±0.05mm).
Q11: What tool is needed?
Feeler gauge set (0.05-1.0mm). Wrench for eccentric bolts.
Q12: Can I adjust gap without feeler gauge?
Not recommended. Feeler gauge ensures accuracy (±0.05mm). Paper can be used temporarily.
Q13: How to lock adjustment?
Tighten locking nuts. Use thread locker (Loctite) for vibration-prone mills.
Q14: How to check if gap is correct?
Run mill empty. No scraping noise. Measure output – should be at rated capacity.
Q15: When to call a technician?
If eccentric bolts seized. If gap cannot be adjusted to spec. If unusual noise after adjustment.
12. Commercial Call-to-Action
For operators and maintenance teams: Request a pellet mill roll shell adjustment guide with feeler gauge, torque specs, and step-by-step video – essential for optimal output.
This CTA appears after Section 2 (parameters table), after Section 5 (comparison table), within FAQ after Q8, and at the end of this document.
Need a feeler gauge set? Contact parts team for 0.05-1.0mm feeler gauge – accurate gap measurement.
Looking for training video? Request roll shell adjustment video for your mill type (ring die or flat die).
To proceed: Send your inquiry via the contact form. Include mill type (ring/flat die), number of rollers, and current output (t/h).
13. Author & E-E-A-T Credentials
Author: Zhang Wei
Maintenance Specialist & Roller Adjustment Expert
- 11 years in pellet mill maintenance and roller adjustment (2014–present)
- Trained 500+ operators on pellet mill roll shell adjustment
- Documented output improvements from correct gap setting (+30-50%)
- Author of “Pellet Mill Roller Adjustment Guide” (China Machine Press, 2022)
- Certified Maintenance & Reliability Professional (CMRP)
Affiliation: Shandong Changsheng Machinery Co., Ltd.
The author has directly performed pellet mill roll shell adjustment on 500+ mills across 40 countries, documenting output improvements and die life extension. All gap specifications, adjustment procedures, and troubleshooting tips are derived from actual field results from 2014–2026.