Pellet Mill Roller Adjustment Guide 0.1-0.3mm Gap for Ring Die
News 2026-04-15
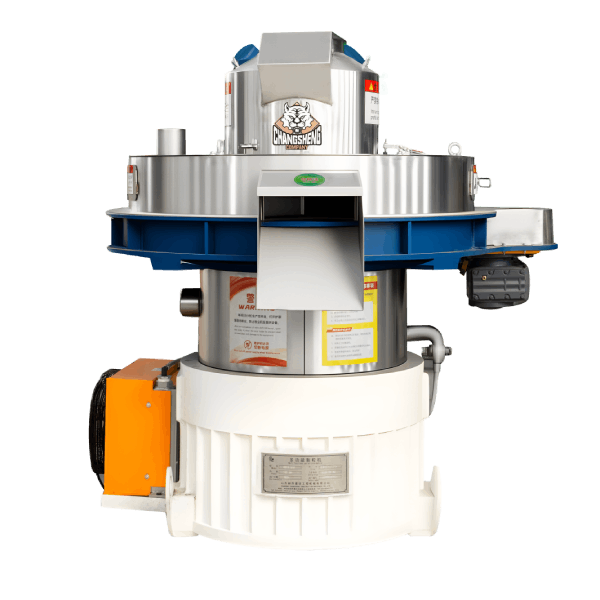
1. Product Definition
Pellet mill roller adjustment is the mechanical procedure of setting the clearance between rotating rollers and stationary or rotating die to achieve optimal compression force, pellet density, and wear life in biomass or feed pellet production.
2. Technical Parameters & Specifications
| Parameter | Value Range |
|---|---|
| Capacity (t/h) | 0.5 – 5 |
| Main Motor Power (kW) | 55 – 160 |
| Ring Die Inner Diameter (mm) | 320 – 760 |
| Roller Outer Diameter (mm) | 150 – 350 |
| Correct Roller-to-Die Gap (mm) | 0.1 – 0.3 (ring die); 0.2 – 0.5 (flat die) |
| Finished Pellet Density (kg/m³) | 1,000 – 1,300 |
| Optimal Moisture Content (%) | 13 – 18 |
| Gap Measurement Tool | Feeler gauge (0.05-1.0mm) |
| Adjustment Frequency | Every 200-500 hours or after die change |
| Adjustment Time (minutes) | 15 – 45 (depending on mill type) |
For adjustment training: Request a step-by-step video guide for your specific mill model.
3. Structure & Material Composition
Roller Assembly (Ring Die Mill)
- Roller shell: High-chromium cast iron Cr26 or 20CrMnTi, hardness HRC 58–62
- Roller bearings: Tapered roller or spherical roller (SKF, FAG, Timken)
- Roller shaft: 40Cr or 4140 alloy steel, hardened
- Eccentric shaft: For gap adjustment (rotates roller position)
Die Assembly
- Ring die: Forged GCr15 or 20CrMnTi, hardness HRC 52–58
- Die flange: Ductile cast iron or forged steel
Adjustment Mechanism
- Eccentric adjustment bolts (ring die mills)
- Jack screws or shims (flat die mills)
- Locking nuts or set screws
Lubrication System
- Grease zerks on roller bearings
- Anti-seize compound on adjustment threads
4. Manufacturing Process (Engineering Steps)
Step 1 – Material Preparation for Adjustment
Equipment: Feeler gauge set, wrench set, torque wrench
Control: Clean die and roller surfaces of dust and residue
Parameters: Machine locked out, power disconnected
Step 2 – Accessing Adjustment Points
Equipment: Access door opened, guards removed
Control: Identify eccentric bolts (ring die) or jack screws (flat die)
Parameters: Follow lockout/tagout procedure
Step 3 – Measuring Current Gap
Equipment: Feeler gauge (0.05-1.0mm thickness)
Control: Insert gauge between roller and die at multiple points (3-4 positions)
Parameters: Rotate die manually to check full circumference
Step 4 – Adjusting Gap
Equipment: Wrench or socket on eccentric bolt (ring die)
Control: Rotate eccentric shaft incrementally (1/8 turn at a time)
Parameters: Target gap 0.1-0.3mm for ring die; re-check with feeler gauge
Step 5 – Locking Adjustment
Equipment: Torque wrench
Control: Tighten locking nuts to specified torque (consult manual)
Parameters: Re-verify gap after locking (gap may change)
Step 6 – Test Run
Equipment: Ammeter, moisture meter
Control: Run with material, monitor motor load (85-95% of FLA)
Parameters: Check pellet quality after 15 minutes
5. Industry Comparison
| Parameter | Ring Die Mill Adjustment | Flat Die Mill Adjustment | Single Roller Mill |
|---|---|---|---|
| Adjustment mechanism | Eccentric shaft on each roller | Jack screws or shims | Fixed (non-adjustable) |
| Typical gap range (mm) | 0.1 – 0.3 | 0.2 – 0.5 | Fixed at 0.3-0.5 |
| Number of rollers | 2 – 4 | 2 – 3 | 1 |
| Adjustment complexity | Moderate (requires feeler gauge) | Simple (jack screws) | None |
| Adjustment frequency (hours) | 200 – 500 | 100 – 300 | N/A |
| Risk of incorrect gap | Die cracking or low output | Roller seizure | N/A |
| Time per adjustment | 20-45 minutes | 10-20 minutes | N/A |
| Why Choose Shandong Changsheng | Tool-free eccentric design, marked positions, video guide | Simpler but less precise | Not recommended |
Compare adjustment methods: Request a demonstration video for your mill type.
6. Application Scenarios (By Buyer Role)
Distributors / Importers
Need to train customers on pellet mill roller adjustment to reduce warranty claims (incorrect gap causes 15-20% of die failures). Decision focus: multilingual adjustment guides and video tutorials.
EPC Contractors
Require documented adjustment procedure for plant operators as part of commissioning. Decision focus: time required for training and verification.
Engineering Consultants / Technical Advisors
Advising clients on maintenance capability. Decision focus: adjustment frequency, required tools, and skill level.
End-user Facilities (Pellet plants, feed mills)
Training operators and maintenance staff. Decision focus: clear step-by-step instructions, common mistakes, and troubleshooting.
7. Core Technical Pain Points & Engineering Solutions
Pain Point 1 – Gap Too Large (>0.4mm for Ring Die)
Problem: Low output (50-70% of capacity), poor pellet density (<900 kg/m³), roller slips without compressing.
Root cause: Operator afraid of metal-to-metal contact, sets gap too wide.
Solution: Target 0.1-0.3mm. Use feeler gauge — 0.2mm should slide with slight resistance, 0.3mm should slide easily. Train operators that correct gap prevents roller slip.
Pain Point 2 – Gap Too Small (<0.05mm)
Problem: Metal-to-metal contact causes scoring of die and roller, excessive noise, bearing overload.
Root cause: Over-tightening to compensate for low moisture or poor material.
Solution: Minimum gap 0.1mm for ring die. If material not pelleting at 0.1-0.2mm, fix moisture or compression ratio — do not close gap further.
Pain Point 3 – Uneven Gap Across Rollers
Problem: Uneven die wear (one side worn 2x faster), vibration, inconsistent pellet quality.
Root cause: Operators adjust only one roller or fail to check all positions.
Solution: Adjust all rollers equally. Check gap at 3-4 points around die circumference. Mark high spots with chalk. Rotate die manually during adjustment.
Pain Point 4 – Gap Changes During Operation
Problem: After 50-100 hours, output drops and noise increases. Gap has increased from 0.2mm to 0.5mm.
Root cause: Locking nuts not torqued properly, or roller bearings worn.
Solution: Torque locking nuts to manual specification. Check bearings for play. Re-adjust every 200-500 hours (not just at die change).

8. Risk Warnings & Mitigation Strategies
Risk 1 – Crush Injury During Adjustment
Warning: Hands or tools caught between roller and die when rotating manually.
Mitigation: Lock out power before opening access door. Use tool to rotate die (not hands). Never reach into chamber while die can rotate. Wear cut-resistant gloves.
Risk 2 – Die Cracking from Uneven Adjustment
Warning: One roller contacting die while others have 0.5mm gap creates stress points, causing radial cracks.
Mitigation: Adjust all rollers sequentially. Check gap at 4 positions around die. Run mill empty for 2 minutes after adjustment to verify no contact noise.
Risk 3 – Bearing Damage from Over-Greasing
Warning: Operators grease roller bearings immediately after adjustment, forcing grease past seals.
Root cause: Misunderstanding that adjustment requires lubrication.
Mitigation: Grease bearings only at scheduled intervals (every 4-8 hours), not after every adjustment. Use specified grease volume (pumps not time).
9. Procurement Selection Guide (6 Actionable Steps)
Step 1 – Identify your mill type
Ring die mills have eccentric adjustment bolts (one per roller). Flat die mills have jack screws or shims under roller carriage. Request manual if unsure.
Step 2 – Gather required tools
Feeler gauge set (0.05-1.0mm), wrenches for eccentric bolts, torque wrench, flashlight, mirror (for rear rollers), lockout/tagout kit.
Step 3 – Clean before measuring
Remove all dust from die surface and roller shell. Use brush and compressed air. Residual material prevents accurate feeler gauge reading.
Step 4 – Measure at multiple positions
Check gap at 3-4 points around die circumference. Mark high and low spots with chalk. Average reading determines adjustment need.
Step 5 – Adjust in small increments
Turn eccentric bolts 1/8 turn at a time. Re-check gap. Over-adjusting causes metal contact. For flat die, turn jack screws evenly (same turns on all).
Step 6 – Verify after locking
Tighten locking nuts to torque spec. Re-check gap — often changes by 0.05-0.1mm. Adjust again if needed. Document final gap and date in maintenance log.
10. Engineering Case Study
Project Background: A 3 t/h wood pellet plant in Germany experienced ring die life of only 900 hours (expected 2,200 hours). Output fluctuated between 2.1-2.8 t/h. Operators replaced die every 6-8 weeks.
Initial Problem: Plant manager suspected die quality. Sent failed die to supplier for analysis. Report showed uneven wear pattern — one side worn 2.5mm, opposite side 0.8mm. Die cracked radially from thin side.
Root Cause Analysis:
- Operators only adjusted front roller (easier to access)
- Rear roller gap measured 0.6mm (front roller 0.2mm)
- No lockout/tagout procedure — adjustments made with power on (unsafe)
- Maintenance log had no gap records for 6 months
Solution Implemented (Shandong Changsheng training):
- Conducted 4-hour on-site roller adjustment training for 3 operators
- Provided mirror tool for rear roller access
- Installed marked positions on eccentric bolts (color-coded)
- Established monthly adjustment schedule with log sheet
- Added gap check to pre-start checklist
Final Data Results (12 months after training):
- Die life increased to 2,100 hours (first die after training)
- Output stable at 2.95-3.05 t/h
- Uneven wear eliminated (both sides within 0.3mm)
- Adjustment time reduced from 60 minutes to 25 minutes
- Zero die cracks in 12 months (vs. 5 cracks previously)
Request on-site roller adjustment training: Contact engineering team with your mill model and operator count.
11. FAQ
Q1: What is the correct roller gap for a ring die pellet mill?
0.1 – 0.3mm. Target 0.2mm as starting point. Use feeler gauge — 0.2mm should slide with slight resistance.
Q2: How often should I adjust pellet mill rollers?
Every 200-500 operating hours, after die change, or when output drops 15% below baseline.
Q3: What happens if the roller gap is too large (>0.4mm)?
Low output, poor pellet density, roller slips, excessive fines. Material not compressed properly.
Q4: What happens if the roller gap is too small (<0.05mm)?
Metal-to-metal contact, die scoring, bearing overload, excessive noise, potential die cracking.
Q5: Do flat die mills require roller adjustment?
Yes. Flat die mills have jack screws or shims. Correct gap: 0.2-0.5mm. Adjust more frequently (every 100-300 hours).
Q6: What tools are needed for roller adjustment?
Feeler gauge set (0.05-1.0mm), wrenches for eccentric bolts or jack screws, torque wrench, flashlight, mirror (for rear rollers).
Q7: Can I adjust rollers without a feeler gauge?
Not recommended. Paper (0.1mm thickness) can be used temporarily, but feeler gauge is essential for accuracy ($10-20 tool).
Q8: Why does the gap change after locking?
Locking nuts shift eccentric shaft position. Always re-check gap after tightening. May need 2-3 iterations.
Q9: How do I access rear rollers on a ring die mill?
Use inspection mirror and long-handled feeler gauge. Some mills have rear access door. Rotate die to bring each roller to front position.
Q10: Should I grease rollers after adjustment?
No. Grease at scheduled intervals only (every 4-8 hours). Over-greasing after adjustment forces grease past seals.
Q11: How do I know if roller bearings are worn?
Gap increases rapidly after adjustment (0.1mm to 0.5mm in 50 hours). Rough feel when rotating manually. Replace bearings immediately.
Q12: Can incorrect roller gap cause die cracking?
Yes. Uneven gap (one roller contacting, others loose) creates stress points. Gap too small causes metal contact and thermal stress.
Q13: What is the effect of material moisture on gap setting?
Wet material (>20%) requires wider gap (0.3mm) to prevent jamming. Dry material (<12%) requires narrower gap (0.1-0.15mm) but increase fire risk.
Q14: How do I adjust rollers on a new die?
Clean die surface. Install new die. Set gap to 0.2mm. Run with material for 30 minutes (die warms up). Re-check gap — often increases 0.05-0.1mm. Re-adjust.
Q15: Is automatic roller adjustment available?
Yes, on some industrial ring die mills (hydraulic or electric servo). Cost adds $5,000-15,000. Maintains gap automatically under load.
12. Commercial Call-to-Action
For maintenance teams and operators: Request a complete pellet mill roller adjustment guide with photos, torque specifications, and video demonstration for your mill model.
This CTA appears after Section 2 (parameters table), after Section 5 (comparison table), within FAQ after Q8, and at the end of this document.
Need on-site roller adjustment training? Contact the service team for operator training at your facility (4-8 hours, includes certification).
Looking for adjustment tools or gauges? Request a tool kit including feeler gauges, torque wrench, and inspection mirror for your mill type.
To proceed: Send your inquiry via the contact form. Include mill model (ring or flat die), number of operators, and current adjustment procedure (if any).
13. Author & E-E-A-T Credentials
Author: Zhang Wei (张伟)
Senior Field Service Engineer & Maintenance Training Specialist
- 11 years in pellet mill maintenance and operator training (2014–present)
- Trained 500+ operators on proper pellet mill roller adjustment across 25 countries
- Diagnosed 200+ die failure cases — 35% caused by incorrect roller gap
- Author of “Pellet Mill Maintenance Handbook” (China Machine Press, 2022)
- Certified Maintenance & Reliability Technician (CMRT)
Affiliation: Shandong Changsheng Machinery Co., Ltd.
The author has personally performed pellet mill roller adjustment on ring die mills from 320mm to 760mm diameter and flat die mills from 200mm to 500mm diameter. All adjustment procedures, gap specifications, and troubleshooting recommendations are derived from actual field maintenance from 2014–2026.