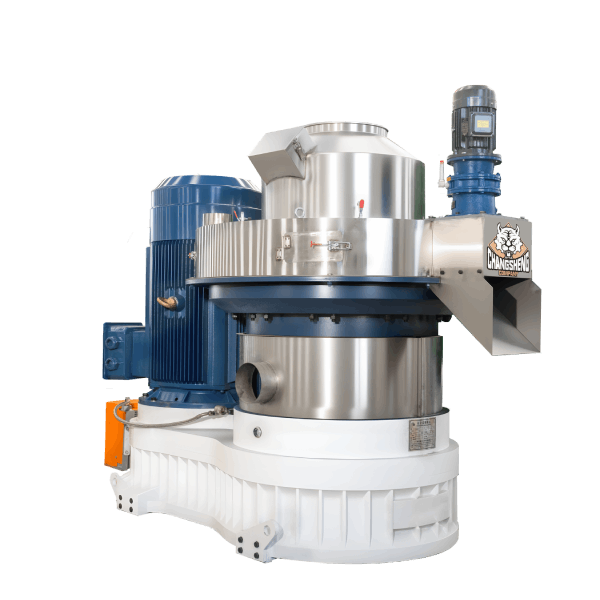
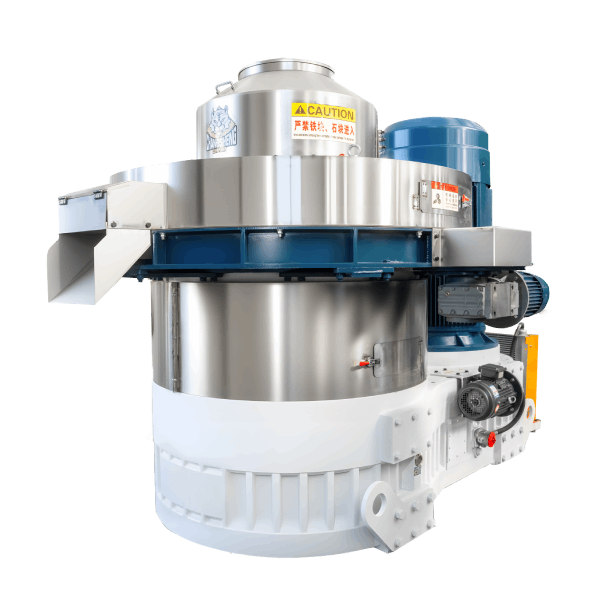
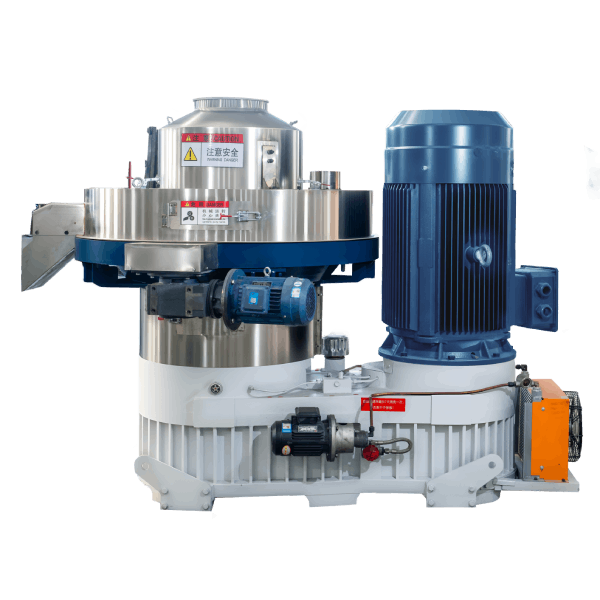
Pellet Mill Keeps Clogging: Causes, Diagnostic Order and Fixes
News 2026-10-17
A pellet mill that keeps clogging after cleaning usually has a cause that was never corrected. Clearing the die restores production for a few hours or a few days, then the same blockage returns. The repeated failure is the real problem, not the blockage itself.
Clogging is rarely a single-cause problem. It is usually a combination of material condition, feed rate, die specification, and roller condition. Because these factors interact, the only reliable way to stop recurring clogging is to check them in a fixed order, confirm which one is actually outside its correct range, and correct that one before moving to the next.
Three symptom patterns help narrow the cause before any check begins:
- Clogs at the same point every shift: usually a feed rate or feeder stability problem, or a material change at a specific point in the process.
- Clogs gradually over hours: usually a moisture or fines accumulation problem inside the die chamber.
- Clogs immediately after startup or after a die change: several causes are possible, including compression ratio mismatch, incorrect roller clearance, improper die installation, or material mismatch. Compression ratio is one item to check, not the only one.
If the pattern is not clear, the diagnostic order below will identify it.
Diagnostic Flow: Where to Start
Use this flow before working through the numbered steps. It prevents wasting time on low-probability causes.<ol> <li><strong>Did clogging start after a material change or a die change?</strong> → Go to Step 4 (compression ratio) and Step 5 (roller clearance) first.</li> <li><strong>Did clogging start gradually without any change?</strong> → Go to Step 1 (moisture) and Step 2 (particle size) first.</li> <li><strong>Does clogging occur at a consistent point in the shift?</strong> → Go to Step 3 (feed rate and feeder stability) first.</li> <li><strong>Has the raw material supply changed source or composition?</strong> → Go to Step 6 (material composition and contamination) first.</li> <li><strong>Have Steps 1–6 all been confirmed within range and clogging still recurs?</strong> → Go to Step 7 (machine type suitability). This is an exclusion conclusion, not a direct inspection item.</li> </ol>
Check These Causes in This Order
Each step states what to check, why it causes clogging, and what to do if it is outside range. Parameter values must come from the machine manual and the die supplier specification. Do not apply values from one model or one material as a general standard.
Step 1 — Material Moisture
Why it causes clogging: Material that is too wet does not bind and does not flow through the die holes evenly. It compresses into a soft mass that bridges inside the die chamber instead of passing through. High moisture is the most common moisture-related cause of clogging and should be checked first.
Low moisture also causes clogging, through a different mechanism: dry material produces excessive fines, the fines pack into die holes, the effective open area of the die decreases, and material backs up. This chain is why “the material is dry” does not rule out moisture as a cause.
What to check: Measure moisture at the point of entry to the pellet mill, not at the raw material storage pile. Moisture changes between storage and the die chamber, especially if a conditioner is used. Take several samples across a production run, not one sample.
What to do: If moisture is outside the range the die was selected for, correct drying or conditioning before adjusting the machine. Do not compensate for high moisture by increasing feed rate or roller pressure. That increases load without solving the flow problem.
Note: The correct moisture range depends on material type, die specification, and whether a conditioner is used. It must be confirmed with a pelletizing test, not assumed from a general figure.
Step 2 — Particle Size and Fines
Why it causes clogging: Oversized particles cannot enter the die holes and block the entrance. Excessive fines pack into the die holes and reduce the open area available for compression. Both conditions reduce throughput and increase the chance of bridging.
What to check: Check the particle size distribution of the material entering the pellet mill, not the raw material before grinding. Look for oversized particles and for the proportion of fines. Check whether the grinder or hammer mill screen has worn or broken.
What to do: Correct grinding before adjusting the pellet mill. If the material contains a high proportion of fines, review whether the die specification is suitable for that material condition.
Step 3 — Feed Rate and Feeder Stability
Why it causes clogging: Feeding too fast overloads the die chamber and causes material to back up. On some machine designs, feeding too slowly allows the die chamber to run dry, which increases friction and temperature and can cause material to bake onto the die surface. Whether low feed rate raises die temperature depends on machine type and die design. Unstable feeding, where the rate fluctuates, causes the same problems intermittently and is harder to detect.
What to check: Observe whether the feeder delivers material at a consistent rate. Check whether the feeder is a fixed-speed type or a variable frequency type. Fixed-speed feeders cannot compensate for changes in material bulk density, which is a common cause of intermittent clogging. Check motor current: rising current at constant feed rate indicates the die is loading up.
What to do: Adjust feed rate to match the die and material condition. If the feeder cannot maintain a stable rate, consider variable frequency feeding. Do not use feed rate to compensate for a die or moisture problem.
Step 4 — Die Compression Ratio and Die Hole Condition
Why it causes clogging: A compression ratio that is too high for the material increases power demand and slows material flow through the die, causing backup. A compression ratio that is too low produces soft pellets and excessive fines, which then pack into the die holes. A worn die has enlarged or polished holes that no longer compress material correctly, and a damaged die has partially blocked holes.
What to check: Confirm the die compression ratio against the material being run. Inspect die holes for blockage, wear, or damage. Check whether the die has been run with a different material than it was selected for. Confirm the compression ratio definition used by the die supplier, because different suppliers define it differently and values are not directly comparable.
What to do: If the compression ratio is wrong for the material, the die must be changed. Cleaning will not correct it. If the die is worn or damaged, replace it. Do not attempt to re-drill or modify die holes outside the manufacturer procedure.
Step 5 — Roller Clearance and Roller Wear
Why it causes clogging: Roller clearance that is too large reduces the compression force applied to the material, so material is not pushed into the die holes effectively. Clearance that is too small increases friction and heat and can cause material to bake onto the die. Worn rollers cannot maintain consistent pressure across the die surface, which causes uneven flow and localized clogging.
What to check: Check roller clearance against the machine manual specification. Check roller surface condition for wear or flat spots. Check whether all rollers apply consistent pressure, especially in multi-roller configurations.
What to do: Adjust clearance according to the machine manual. Replace worn rollers. Do not set clearance outside the manufacturer range to compensate for a die or moisture problem.
Step 6 — Raw Material Composition and Contamination
Why it causes clogging: Material with high fiber content, high density, or abrasive contaminants behaves differently in the die. Mineral contamination such as sand or stones can partially block die holes and accelerate wear. Mixed materials with different moisture and density can cause inconsistent flow.
What to check: Check whether the material composition has changed since the die was selected. Check for contamination in the raw material supply. Check whether a new material has been introduced into a line designed for a different material.
What to do: Correct material preparation before adjusting the machine. If the material composition has changed permanently, the die specification may need to be changed.
Step 7 — Machine Type Suitability
This step is an exclusion conclusion, not a direct inspection item. It applies only after Steps 1–6 have all been confirmed within range.
Why it causes clogging: A machine that is structurally unsuitable for the material will clog repeatedly regardless of operating adjustments. Flat die machines tolerate varied and mixed materials better but have limited continuous operation capability. Ring die machines handle higher capacity and continuous operation better but require more consistent material preparation. A machine running outside its intended material range will clog.
What to review: Review whether the machine type matches the material consistency, operating hours, and target pellet quality. Review whether the machine was originally selected for a different material.
What to do: If the machine type is the root cause, operating adjustments will only reduce the frequency of clogging, not eliminate it. The decision then becomes whether to change the die and feeder configuration or to change the machine type.
When to Stop Operation and Inspect
The following conditions require stopping the machine before further inspection. Values must come from the machine nameplate, control cabinet setting, or manufacturer manual. Do not use values from one model as a general standard.
| Condition | Action |
|---|---|
| Motor current exceeds the limit stated in the machine manual or control cabinet setting | Stop feed, then stop main motor. Inspect die chamber. |
| Die chamber temperature exceeds the limit stated in the machine manual | Stop feed, then stop main motor. Inspect for baked material on die surface. |
| Abnormal noise or vibration from the drive system | Stop immediately. Inspect gearbox or belt drive before restart. |
| Material backs up into the feeder | Stop feed. Do not continue running with a full die chamber. |
| Die hole damage or partial blockage visible | Stop. Replace or repair die before restart. |
Clogging Cause and Fix Table
This table is a quick reference for use during diagnosis. It does not repeat the explanations in the steps above.
| Symptom pattern | Most likely cause | Check |
|---|---|---|
| Gradual clogging, soft material in die chamber | Moisture too high | Moisture at pellet mill inlet |
| Excessive fines, die hole packing | Moisture too low | Moisture at pellet mill inlet, fines proportion |
| Blockage at die hole entrance | Oversized particles | Particle size distribution at pellet mill inlet |
| Reduced throughput, die hole packing | Excessive fines | Fines proportion in feed material |
| Clogging at consistent point in shift, rising motor current | Feed rate too high | Feeder rate, motor current |
| Intermittent clogging, temperature fluctuation | Feed rate too low or unstable | Feeder type, rate consistency |
| Clogging after die change or material change | Wrong compression ratio | Die compression ratio vs material |
| Gradual decline in output, localized blockage | Worn or damaged die | Die hole condition, wear pattern |
| Uneven flow, localized clogging | Roller clearance incorrect | Roller clearance vs manual specification |
| Inconsistent compression, uneven die wear | Worn rollers | Roller surface condition |
| Sudden blockage, die hole damage | Material contamination | Raw material supply, foreign objects |
| Repeated clogging despite correct operation | Machine type mismatch | Machine type vs material and operating hours |

Operating Causes vs Design Causes
This section explains how to classify what the diagnostic order found. It does not repeat the check procedure.
Operating causes can usually be corrected on site without changing parts:
- Moisture outside the correct range
- Particle size distribution outside the correct range
- Feed rate too high or too low
- Roller clearance outside the manual specification
- Temporary material contamination
Design causes cannot be corrected by operating adjustment alone:
- Die compression ratio wrong for the material
- Die or rollers worn beyond service limits
- Feeder type unable to maintain stable feed rate for the material
- Machine type unsuitable for the material consistency or operating hours
- Material composition permanently changed from the original design basis
If the diagnostic order identifies a design cause, operating adjustments will only reduce clogging frequency, not eliminate it. The correct action is to change the die, the feeder, or the machine configuration.
How to Clear a Clogged Die Safely
Clearing a clogged die incorrectly can damage the die, damage the rollers, or cause injury. Follow the machine manual procedure. The general sequence is:
- Stop the feed first, then stop the main motor. Do not stop the main motor while the die chamber is full of material.
- Lock out the power supply before opening the die chamber.
- Remove material from the die chamber using the tools specified in the machine manual. Do not use a metal tool to force material through die holes.
- Inspect die holes for blockage, damage, or embedded material.
- Check roller clearance and roller condition before restarting.
- Restart at reduced feed rate and confirm stable operation before returning to normal rate.
Do not restart the machine with a partially cleared die chamber. Residual material will be compacted again within a short time, causing repeated blockage and possible localized die wear.
Material Testing: What to Request Before Changing the Die
If the diagnostic order points to a die or machine configuration problem, a pelletizing test with the actual material is the most reliable way to confirm the correct configuration. Request the following from the supplier:
| Test item | Why it matters |
|---|---|
| Raw material type and composition | Determines die and roller suitability |
| Moisture content at pellet mill inlet | Determines whether drying or conditioning is required |
| Particle size distribution | Determines whether grinding adjustment is needed |
| Pellet diameter target | Determines die hole size |
| Die specification used in test | Determines whether the result applies to your die |
| Compression ratio and its definition | Different suppliers define it differently; values are not directly comparable |
| Roller configuration | Determines whether the result applies to your machine |
| Test duration | Short tests may not reveal gradual clogging |
| Output result | Capacity figure must be tied to the conditions above |
| Power consumption during test | Indicates whether the die is suitable for continuous operation |
| Pellet quality observation | Density, durability, and fines proportion |
A test result without these conditions is not a technical commitment.
Preventing Clogging in Daily Operation
Recurring clogging is usually prevented by controlling the conditions that cause it, not by reacting after it happens. The check frequency below is a practical starting point. General maintenance intervals should follow the machine manufacturer manual.
| Check | Suggested frequency | Purpose |
|---|---|---|
| Motor current at normal operation | Each shift | Detect rising load before clogging occurs |
| Moisture at pellet mill inlet | Each shift, or at material source change | Detect moisture drift |
| Particle size distribution after grinding | Daily, or at material source change | Detect oversized particles and fines |
| Die hole condition | Weekly, or after any blockage | Detect wear, damage, or partial blockage |
| Roller clearance | Weekly, or after roller replacement | Confirm clearance within specification |
| Die hours in service and material run | Continuous record | Plan die replacement instead of discovering wear |
| Raw material supply source and composition | At each delivery | Detect contamination or composition change |
FAQ
Why does my pellet mill clog even when the material is dry?
Low moisture is also a cause of clogging. Dry material produces excessive fines, the fines pack into die holes, the effective open area of the die decreases, and material backs up. The correct moisture range depends on material type and die specification, and must be confirmed by testing, not assumed from a general figure.
Does clogging happen more in flat die or ring die machines?
Both types can clog. Flat die machines tolerate varied materials better but have limited continuous operation capability. Ring die machines handle higher capacity and continuous operation better but require more consistent material preparation. The cause is usually material or configuration related, not the machine type alone.
How do I know if my die compression ratio is wrong?
If clogging appears after a die change or a material change, and moisture, particle size, feed rate, and roller clearance are all within range, the compression ratio is the likely cause. Confirm the die specification against the material with a pelletizing test.
What feed rate should I run to avoid clogging?
Feed rate depends on material type, moisture, particle size, die specification, and motor load. There is no single correct rate. Set feed rate so that motor current stays within the range stated in the machine manual, and use variable frequency feeding if the material bulk density varies.
When should I replace the die instead of cleaning it?
Replace the die when compression ratio is wrong for the material, when die holes are worn or damaged, or when output has declined gradually despite correct operating conditions. Cleaning only removes the blockage, not the cause.
What to Send Your Supplier If You Cannot Solve It
If the problem cannot be solved on site, the supplier needs specific data to diagnose it correctly. Sending only a description of the symptom usually leads to a generic answer. Collect the following:
| Data item | Why the supplier needs it |
|---|---|
| Material type and composition | Determines die and roller suitability |
| Moisture content at pellet mill inlet | Rules out moisture as a cause |
| Particle size distribution | Rules out oversized particles and fines |
| Feed rate setting | Confirms whether feed rate is within range |
| Die specification and compression ratio | Confirms die suitability for the material |
| Die hours in service | Indicates whether the die is worn |
| Roller clearance setting | Confirms whether clearance is within specification |
| Motor current at normal operation | Indicates load and die condition |
| Clogging pattern | Helps identify the cause category |
| Photos of die chamber and die holes | Shows blockage and wear pattern |
With this data, a supplier can determine whether the cause is operating or design-related, and recommend the correct action instead of a generic checklist. If the diagnostic order does not resolve the clogging, send your material type, moisture, particle size, die specification, and clogging pattern for a configuration review.
Author / Company Information
This article was prepared by a technical content specialist with over ten years of experience in industrial equipment, biomass and feed processing machinery, and B2B export projects. The author has worked with pellet mill projects in feed, biomass, and agricultural processing, and understands the practical challenges buyers face in machine selection, die configuration, capacity planning, and international procurement.
No individual author name, personal engineering experience, or specific project references have been provided. The company affiliation is Shandong Changsheng Machinery Co., Ltd. No fabricated credentials, certifications, or project data are included.